Final Image Preview

For the beginning create a new file (File>New) having 1920×1200px/72ppi. Then take the Paint Bucket Tool (G) and fill the new background layer with the next demonstrated color.

Select the Brush Tool (B) set the Opacity to 20% in Options Bar

Let’s put some brushstrokes on a new layer, the same way demonstrated below:

… and more on a new layer again…

Set for this layer Blend Mode to Color Dodge:

That’s the result you should get:

Find a stock photo with a model represented on it, I used this photo from deviantart. I would like to thank the author of this photo:

Remove the background using your favorite tools like Pen Tool (P), Magic Wand Tool (W), Magnetic Lasso (L) or even a simple Filter>Extract.

Create a new layer and insert here several dots with the brush, changing their sizes with the button [ or ]. The color’s code in this case is #BA93B3

… and more of white color:

Take now the Ellipse Tool (U) and make a circle:
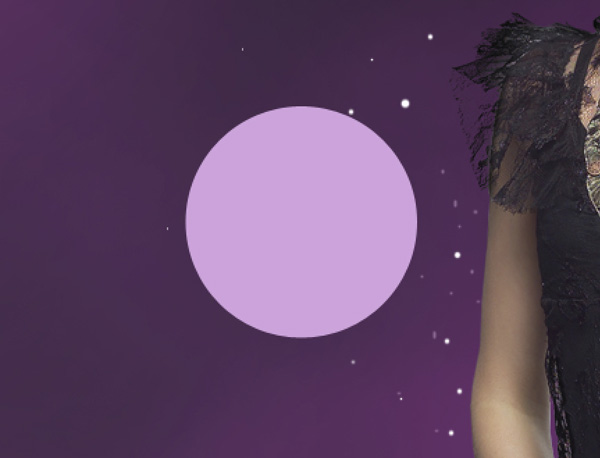
Set Fill to 0% for this layer:

Next select the Layer Style. Make a double click on the left mouse’s button on this layer on the layers’ panel and set the Gradient Overlay as shown:
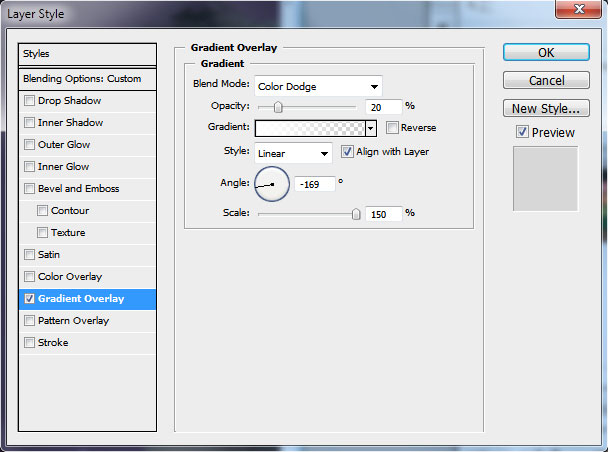
We’ve got a kind of half – transparent circle:

Copy them out (Ctrl+J) and put them arbitrary on the layer, using the Move Tool (V)


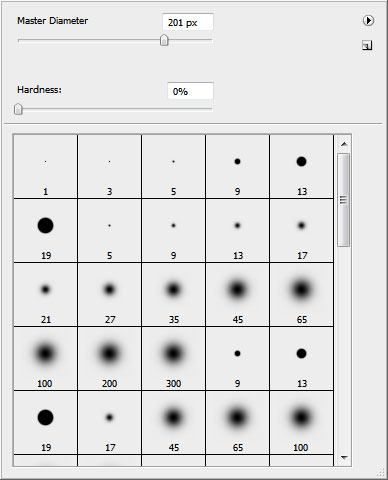
Create a new layer and represent on it a kind of luminescence around the girl. The brush’s settings are demonstrated below. Opacity 10%.

Next insert the adjustment layer Create new fill or adjustment layer > Curves:
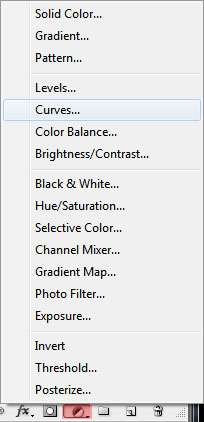
Set it:
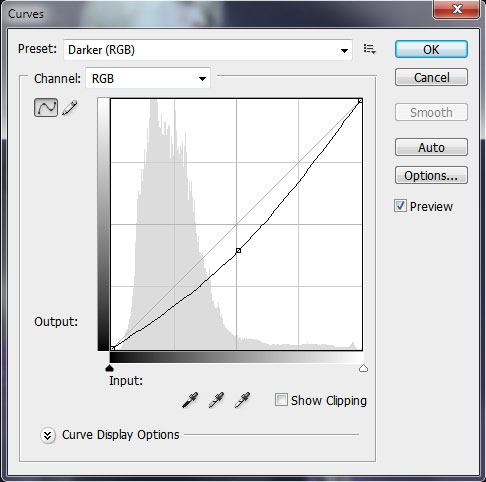
This way, our work became more contrasting and saturated.

Make one more circle using Ellipse Tool (U):

Set the Fill to 0% and Opacity to 70% for its layer:

Next select the Layer Style. Make a double click on the left mouse’s button on this layer on the layers’ panel and set the Inner Shadow as shown:
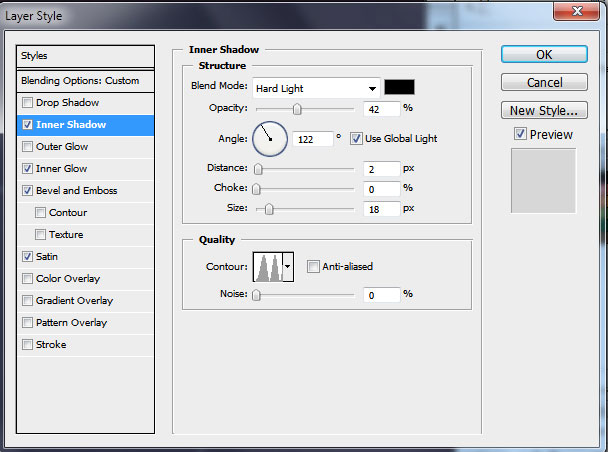
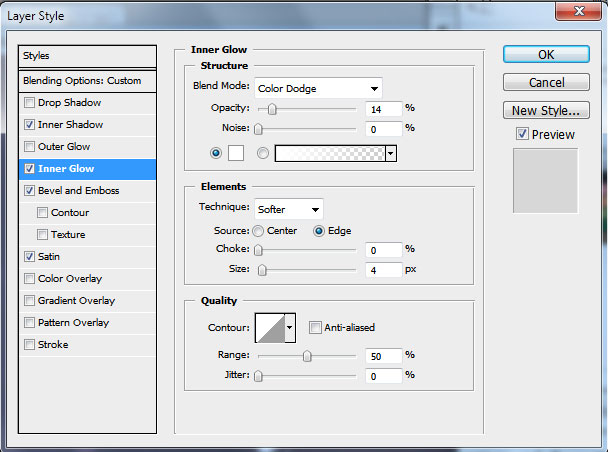
Add Inner Glow:
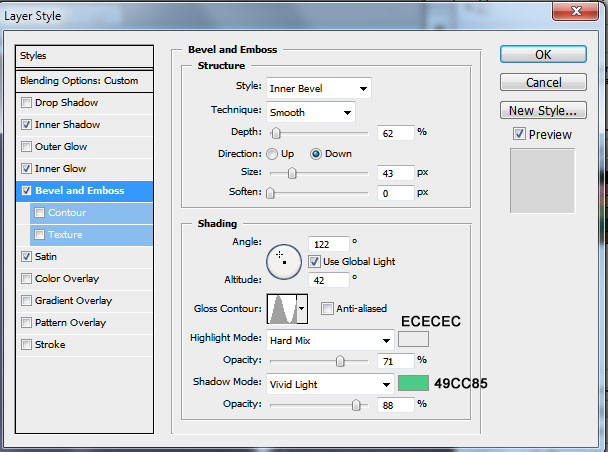
Set Bevel and Emboss:
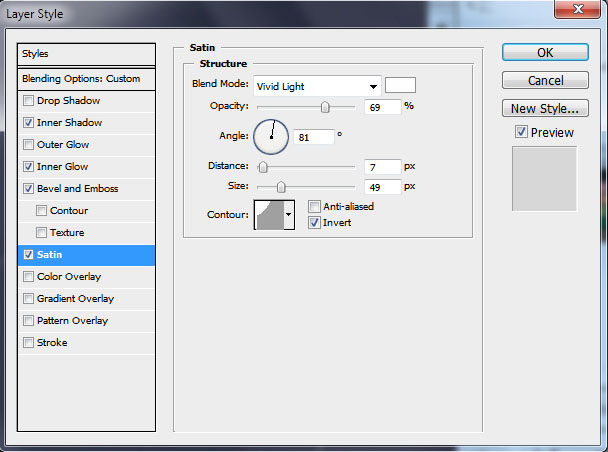
Add Satin:
We’ve got a soap bubble:

Make a copy of it and try to distort it, using the Ctrl+T shortcut, have a right click on it and choose out of the list the Warp option:
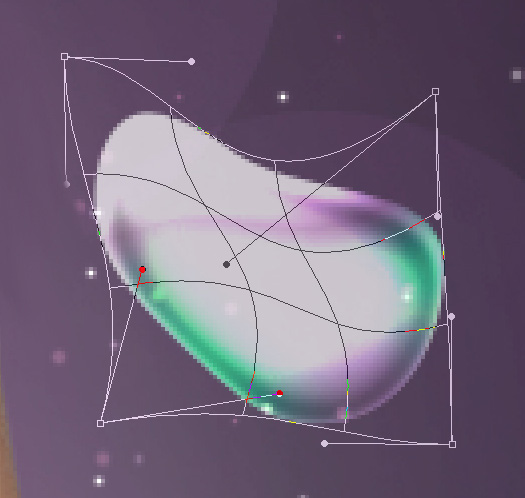
It’s the result you should get on this stage:

On a new layer we’ll represent several lines with the brush:


Smudge them out, applying the Smudge Tool (R) with the Strength on 50%.

Set for this layer Blend Mode to Overlay:


Make a copy of this layer:

Choose on a new layer a brush of white color, Opacity of 10%.
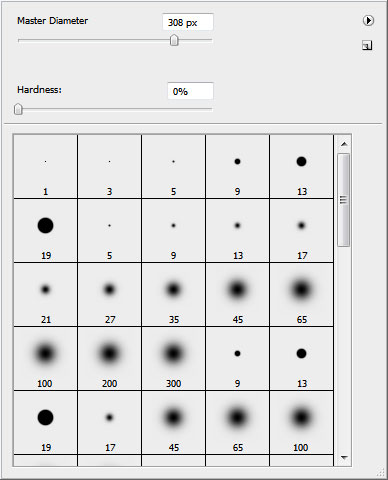
We’ll represent the fog on the picture:

Set for this layer Blend Mode to Overlay:

It’s the result we’ve got:

On a new layer we’ll represent more dots using Brush Tool (B) of the color #EC008C.

… approximately like on the picture:

… and insert several white ones:

Make a copy of the layer containing white dots and select then Filter>Blur>Motion Blur.
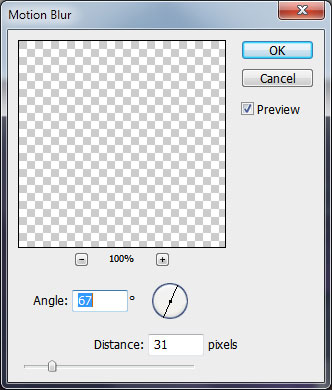
We’ve got the dynamics effect for the dots:

The final result!
In this tutorial I am going to show you some cool tricks to get some awesome custom wallpaper or movie poster. First we need to find our subject, I chose X-MEN movie.
Final Image Preview

Start working by creating a new file (File>New) of 1600×1200px/72dpi. Then select the Paint Bucket Tool (G) to give black color to background layer.

Next try to find a picture with X-Men characters on it. I used this wallpaper:

Cut out the main characters on the front plan, introducing them on our basic picture.

Create a new layer then and choose a standard brush to give some nuance to our picture. The brush has #10F6FF color (Opacity 35%). This layer needs to be placed lower than the characters’ layer on the layers’ panel:


Create another new layer and continue here representing the background, applying the same brush mentioned above. This layer will be placed lower than the characters’ layer on the layers’ panel.

On the next new layer (Create new layer) we’ll apply a standard brush of white color to draw many dots of different sizes and different opacity. This layer will be placed lower than the layer containing the characters.


On the next new layer choose the standard brush and white color (Opacity of 30%) to represent a kind of luminescence around the X-Men characters. This layer will be situated lower than the layer containing the same characters.


Create a new layer and choose this time the Elliptical Marquee Tool (M) to mark out the next demonstrated zone. This layer will be placed lower than the characters’ layer.

The marked zone should be filled with the color #81F4FF.
The layer’s parameters: Opacity 60%.

Make a mouse click on the same layer on Add a Mask selection on the bottom part of the layers’ panel and select later the standard brush of black color (Opacity of 15%) to clean out the painted zone.

Make two copies of the last made layer and choose Free Transform option for changing the copies’ sizes, placing them the way it is demonstrated below (lower than the layer containing the X-Men characters)

Next we’ll represent a kind of circle, applying the Ellipse Tool (U) which layer should be situated lower than the layer with the characters.

Set the next shown parameters for the last made layer by clicking on this layer on the layers’ panel: Fill 0%, Blending Options>Stroke


Make a copy of this last made layer and select Free Transform option to place the copy the same way indicated below.

Create a new layer and choose here the standard brush of white color (Opacity of 70%) to represent a spot of light.
 Choose on the same layer the Rectangular Marquee Tool (M) to mark out a half of the same spot and press Delete button.

Choose next step the Free Transform option for the layer with cut spot and press the spot on its horizontal position, stretching it by the vertical position.

Turn it over and place it the same way as below. This layer should be placed lower than the layer containing the X-Men characters:

Set the next indicated parameters for the last made layer: Blending Options>Gradient Overlay

Gradient’s parameters:


Try to draw the same way several more rays, placing them the way demonstrated next picture. The layers don’t need the effects.

Now we’ll hide several parts of the poster on the bottom part of the picture. In this case we’ll select the Rectangle Tool (U).

The layer’s parameters: Fill 0%, Blending Options>Gradient Overlay

Gradient’s parameters:


Make a click on the bottom part of the layers’ panel on the selection from here: Create new fill or adjustment layer>Brightness/Contrast
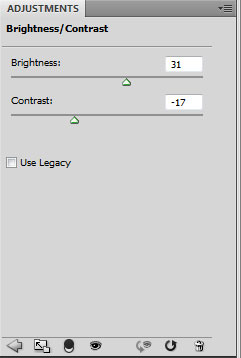

Take the usual standard brush mentioned above and try to paint the right lowest picture’s corner, choosing the #004F52 color.

Now represent a pattern by creating a new file of 6×6px/72dpi. Use here the Pencil Tool (B) (brush 1 px) of black color. The background is absent.
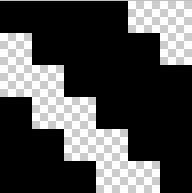
Edit>Define PatternCreate one more new file of 640×480px/72dpi which background should be removed. Select then Edit>Fill (the earlier saved pattern). Move this file on our picture. Select Free Transform and press SHIFT button to stretch out the texture on the whole picture.

Make mouse click on the same layer on Add a Mask selection from the bottom part of the layers’ panel and select a standard brush of black color to clean out the whole zone, except the right lowest corner.
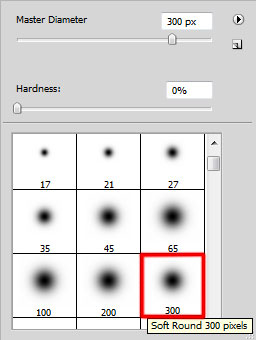

Next we’ll represent several rays the same way we did earlier. Create a new layer where we’ll apply the standard brush. Firstly we need to draw a spot of a big diameter, colored with #728359.

Reducing the brush’s diameter, insert a highlight of white color on the central part.
 Apply the same method we did with the spot cutting.
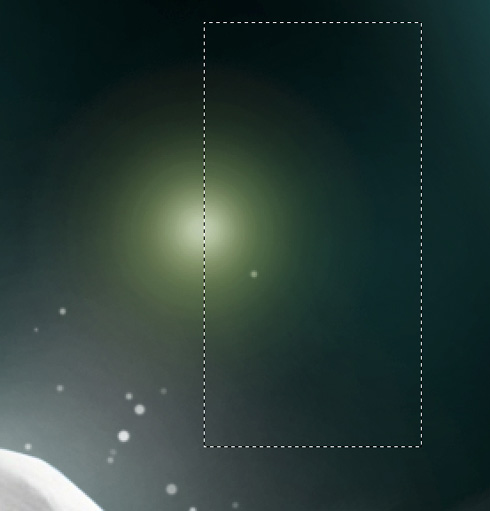
Using the Free Transform option, press horizontally and stretch out by vertical side the element. Place it the same way demonstrated below:

Using the same method and a brush of white color, try to make several more rays.

We’ll represent two more rays, one of them processed with a blue brush. The other one should be of yellow color with a big white inside highlight. The blue ray should be placed on the right side and the yellow one turned over and situated close to the earlier made one.

Make two copies of the white ray. Select after that the Free Transform option to enlarge the size, placing one copy as below:

Turn around one more copy and place it near the earlier placed ray. Choose then the layer’s option Lock Transparent Pixel and a standard brush (Opacity of 40%) to paint the ray with the next colors – dark-blue, green and orange ones as it is pictured below:

Insert the text we need to have on the picture now:
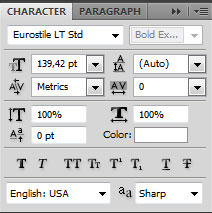

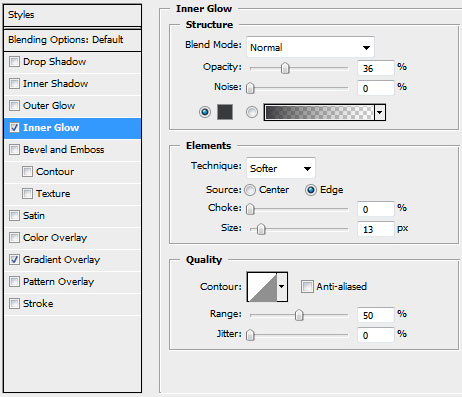
Make a copy of the layer having the text on it. Make a right click on the Convert to Shape option, on the layer situated lower. Get back to the top text’s layer and choose for it the next demonstrated parameters: Blending Options>Inner Glow
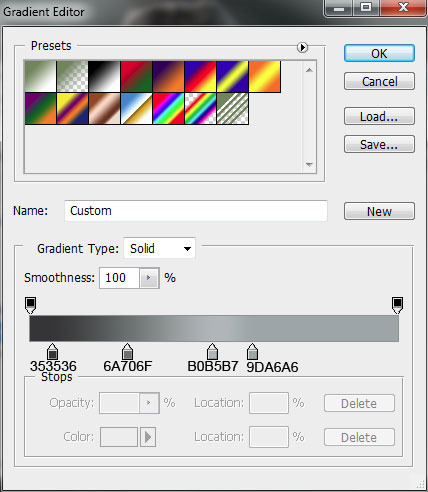
Blending Options>Gradient Overlay
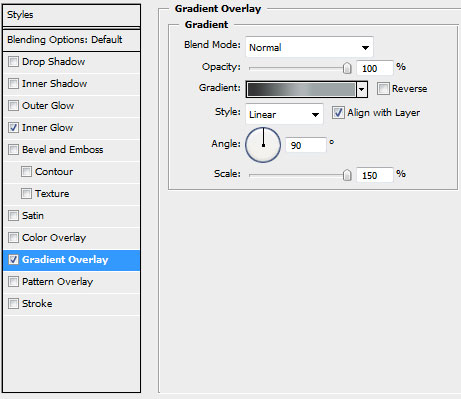
Gradient’s parameters:

Continue with the changed text’s layer situated lower. Select here the Convert Point Tool to stretch out the tops in a way for the layer to come out lower than the top text’s layer:

Create a new layer above the converted text’s layer. Here we’ll need the standard brush of gray color to represent several shadows that will be useful for creating the impression of volume.

Press Alt button while clicking between the converted text’s layer and the brush’s layer (on the layers’ panel).
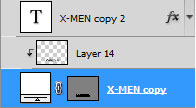

Make a copy of the layer containing the brushes; press Alt button and click between the layers, applying on this copy - layer the parameter from here - Blending mode-Vivid Light


The final result!
To create a warm holiday atmosphere learn how to design a romantic calendar in Valentine’s Day spirit.
Final Image Preview

For the beginning create a new file (File>New) of 1920×1200 px and 72 dpi. Select Blending Options - Gradient Overlay on the first layer by making a mouse click on this layer on the layers’ palette just to get the same gradient as on the next image:
Set the same parameters as those from below:

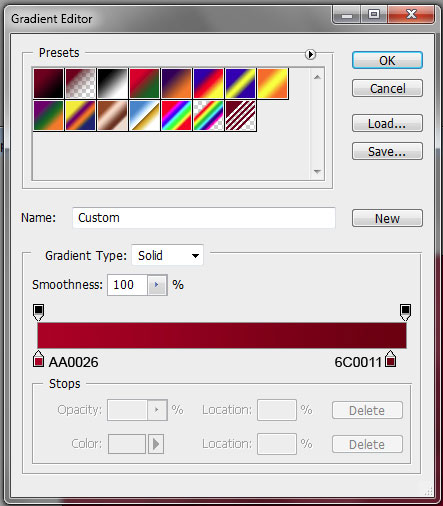
Gradient Editor:

Download a set of ready to use brushes, named 34_Oranments_Flower_brushes_by_bocman1
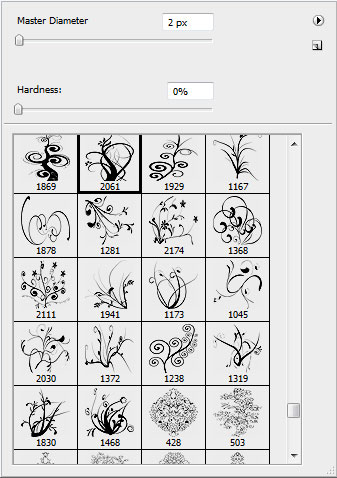
Using the downloaded brushes, try to make a kind of ornament like that one from the next picture:

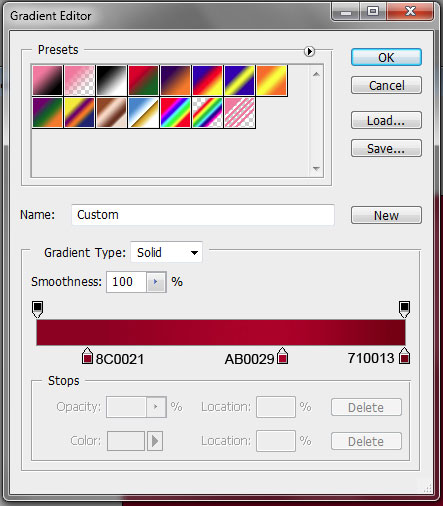
Select the same Blending Options - Gradient Overlay indicated in the table below:

Gradient Editor:
It’s the result you should get at this moment:

Applying the Pen Tool (P), it’s possible to make a heart and situate it on the right part of the screen.

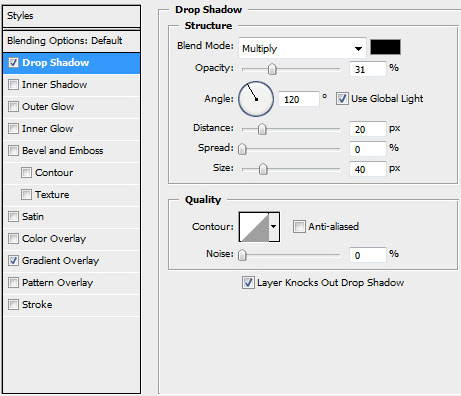
…setting the next demonstrated parameters of Blending Options - Drop Shadow:
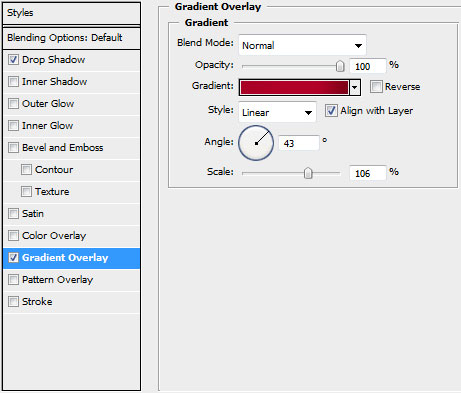
Blending Options - Gradient Overlay:
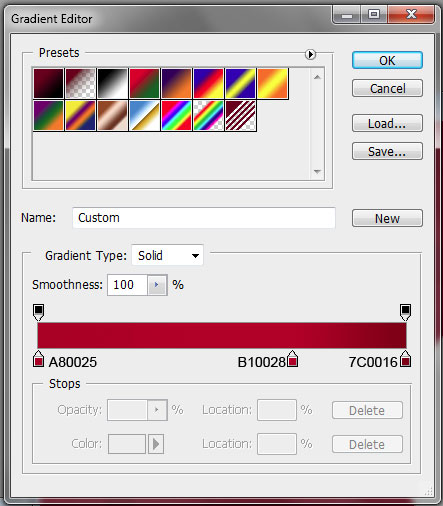
Gradient Editor:
You may see the processed heart, obtaining the shape from below:

Next we’ll make a half-heart element, using the same Pen Tool (P).

Set the same parameters inserted in the next table:
Blending Options - Gradient Overlay
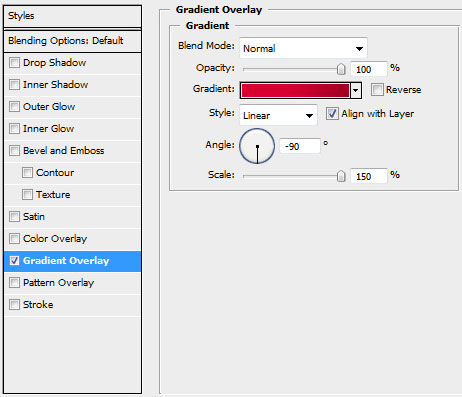
Gradient Editor:
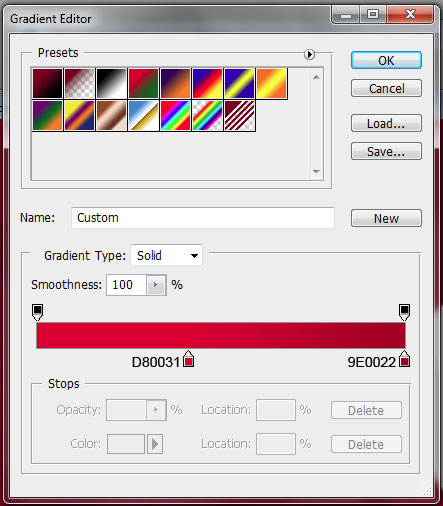
 The same tool may be used for drawing the highlights on the heart:
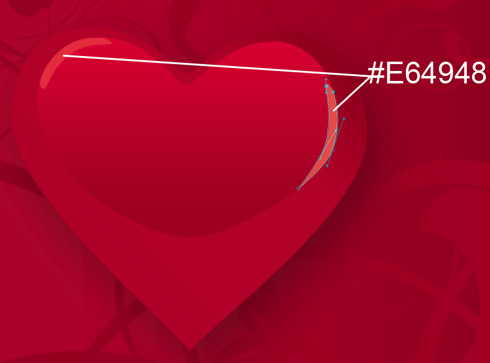
Then we’ll select the Line Tool (U) of 2 px width to represent a vertical thread.

Set the next parameters for the last made element:
Blending Options - Gradient Overlay

Gradient Editor:
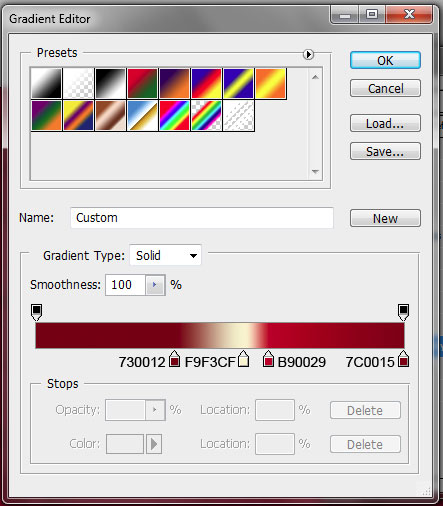
It’s like a ribbon now:

The heart should be copied and then its sizes should be changed with Free Transform option.

Next we’ll choose the very first heart’s layer and make many copies that should be placed arbitrary on the picture:

Insert several bigger hearts of the color #E04549

Now we’ll insert the text we want to have on the wallpapers:

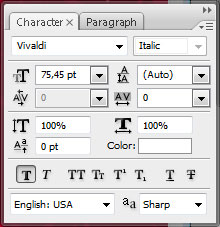
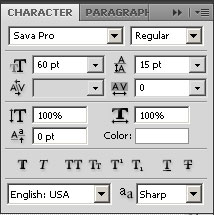
You may see the parameters for the text in the next table:
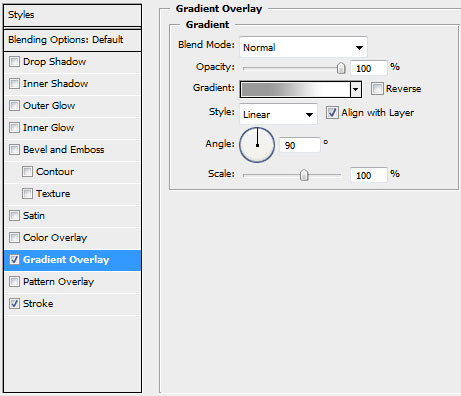
Set the next Blending Options - Gradient Overlay for the text’s gradient:
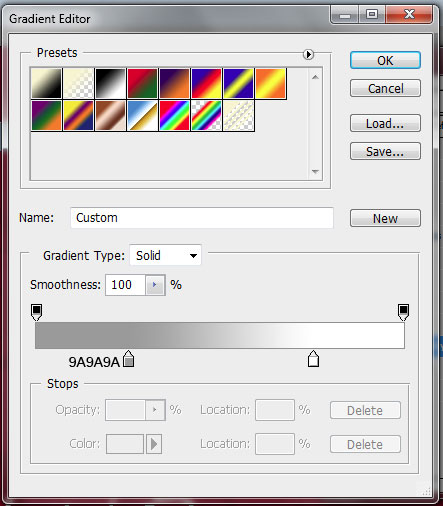
Gradient Editor:
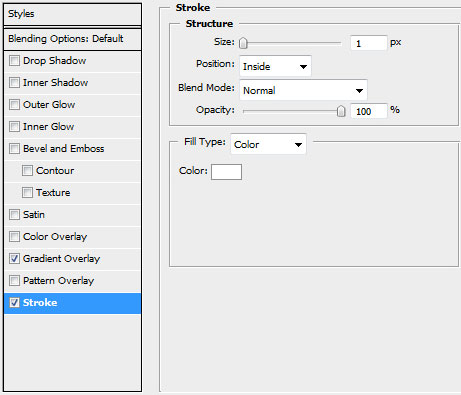
Blending Options - Stroke:
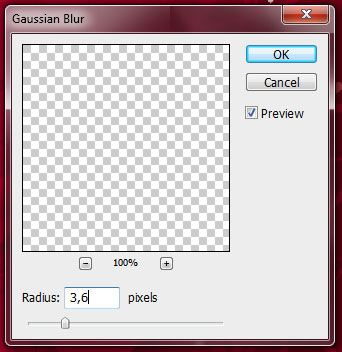
Make a copy of the text, situating the copy under the original one. Then choose the next option – Filter>Blur>Gaussian blur and set the parameters for the last example:

Finished!
View full size here.
To turn our wallpaper into romantic calendar take the Horizontal Type Tool (T) and add with desired font (adjusting the font size) the month (February 2009), the week days …

Tidak ada komentar:
Posting Komentar