
Work with the colors, several possibilities of correcting the drawbacks of the model’s figure. We’ll learn to apply some of the program’s filters too.
Let’s begin working by creating a new file (File>New) with 768×1024 px and 72 dpi. Next select the Paint Bucket Tool (G) to make the new layer of black color.

Apply for the background’s layer this option: Filter>Noise>Add Noise

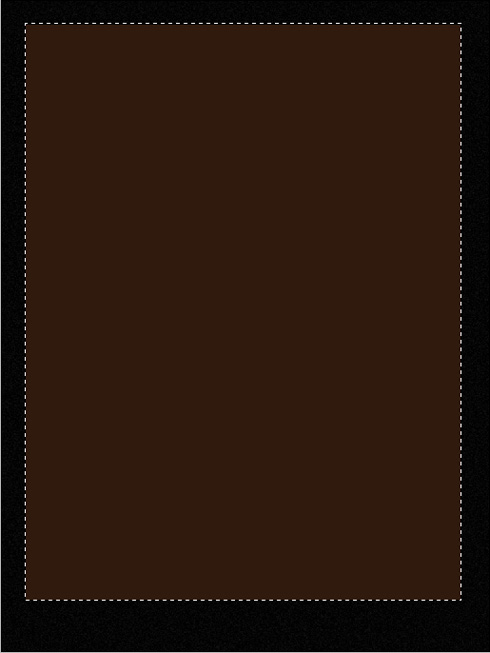
On a new layer (Create new layer) we’ll select the Rectangular Marquee Tool (M) to mark out the necessary zone on the picture, reserved for working with it. After that we’ll apply the Paint Bucket Tool (G) to paint this zone with the next color - #301A0D
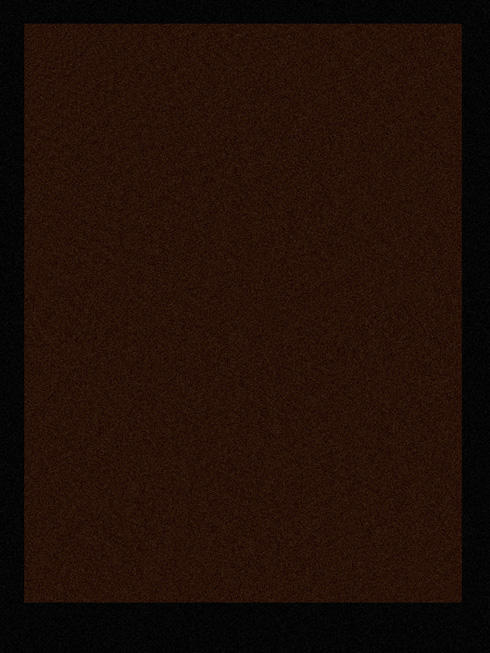
Select for the last layer the same filter used on the black background, choosing the same parameters too:
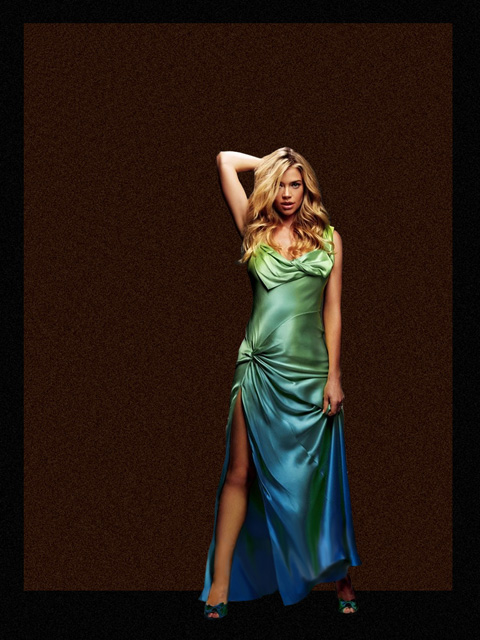
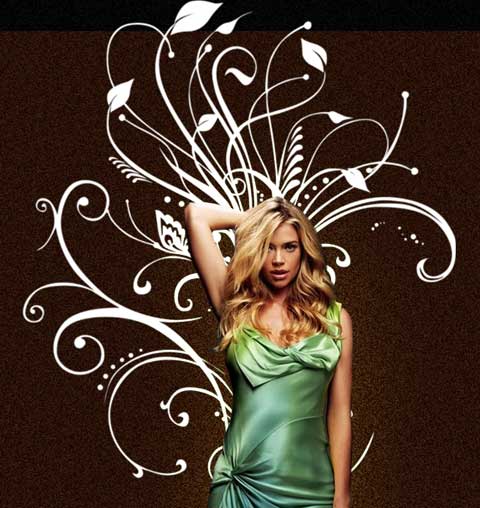
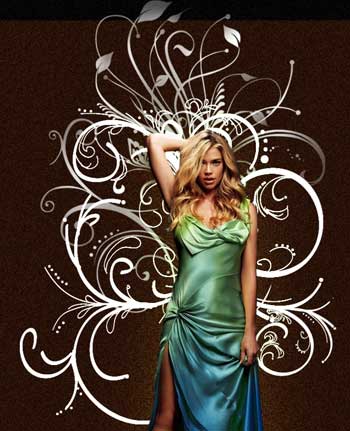
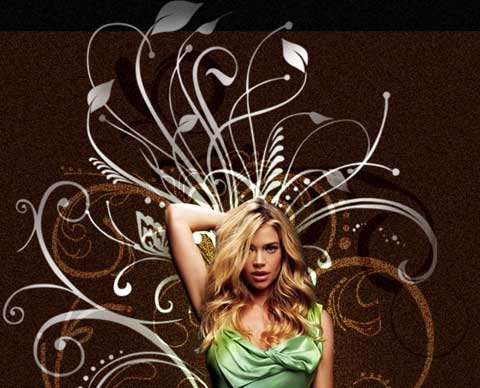
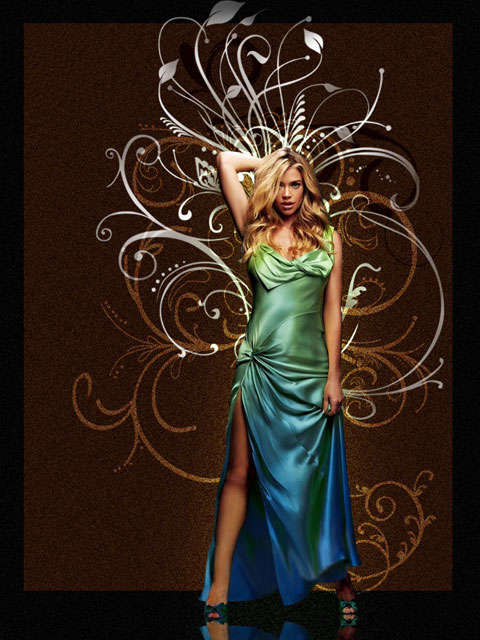
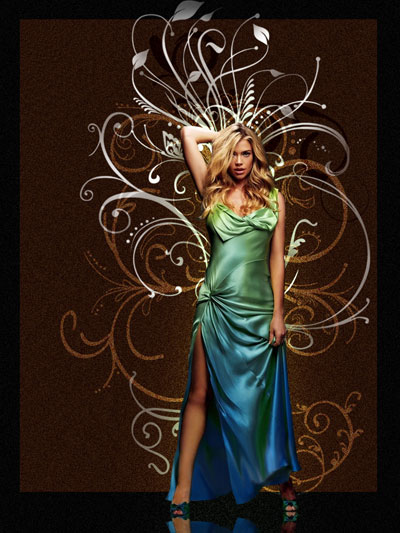
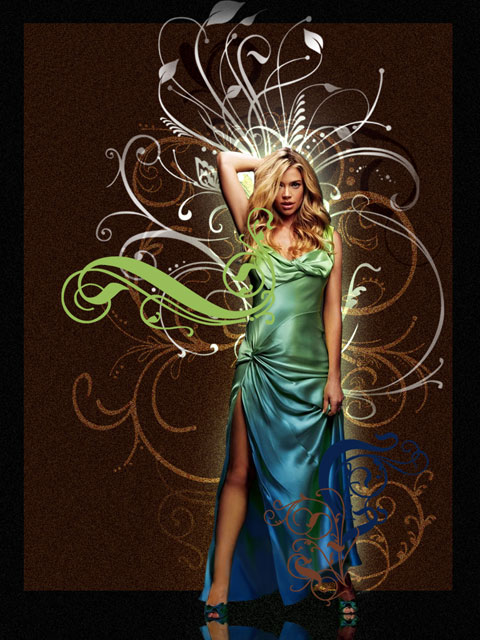
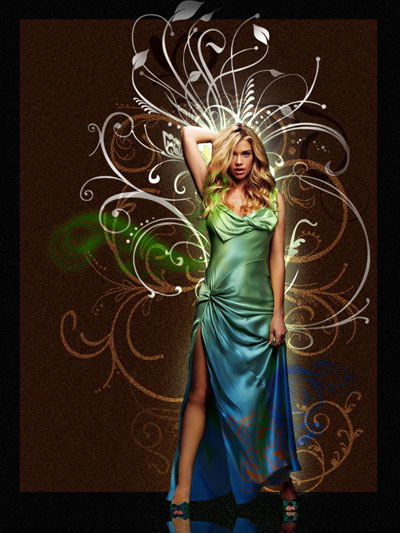
Now we have to find in Internet a photo of a girl, like the next one:
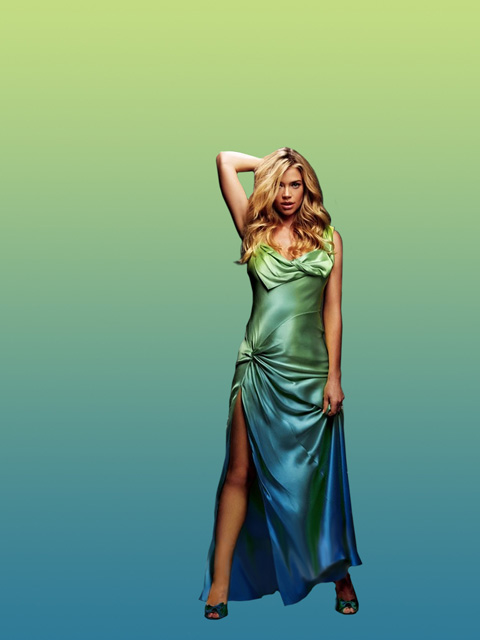
Cit it out and insert it on our picture:
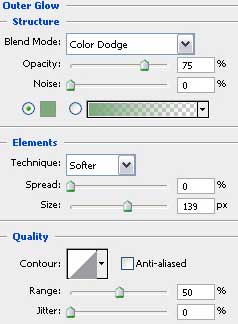
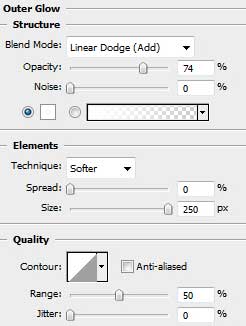
Select the next demonstrated parameters for the girl’s layer: Blending Options>Outer Glow
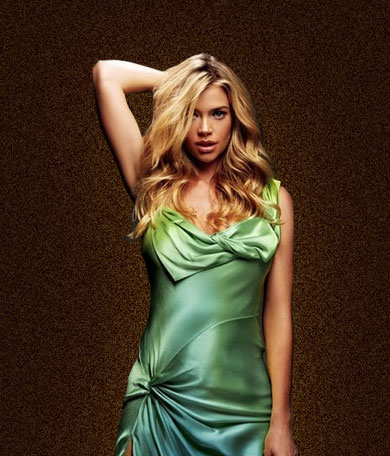
Next we’ll try to draw the girl’s shadow - reflection. This operation needs copying the girl’s layer and choosing Free Transform selection for turning around the copy, placing her reflection under her legs.
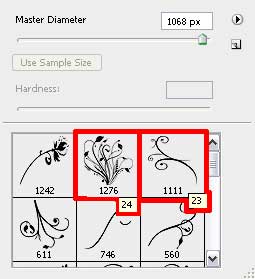
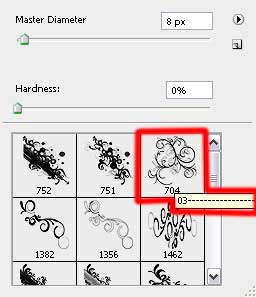
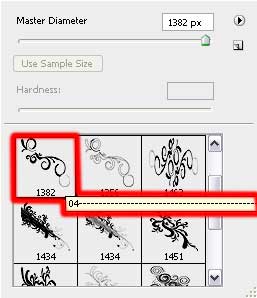
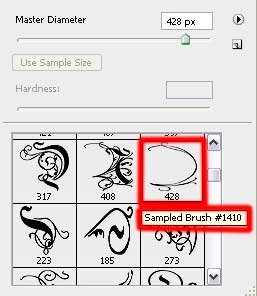
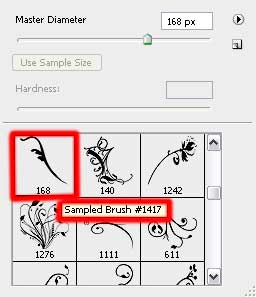
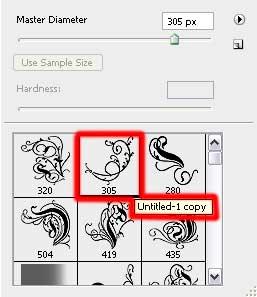
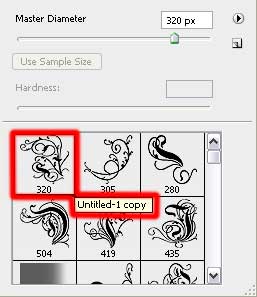
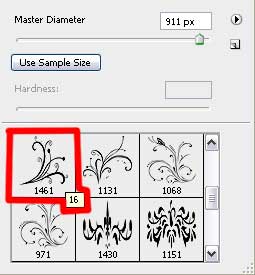
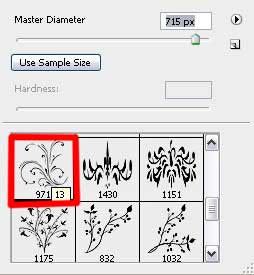
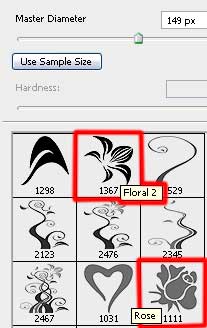
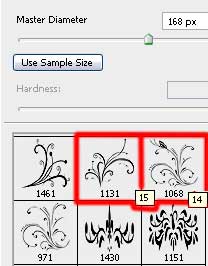
Now we have to download out of Internet a several sets of ready to use brushes in Adobe Photoshop, named Floral, BRUSHES_01_02, Brushes - curls
Attention! If you see an ornament on the picture made with the brush and it is turned over, it means that this brush is applied on a separate layer and turned over with Free Transform selection.
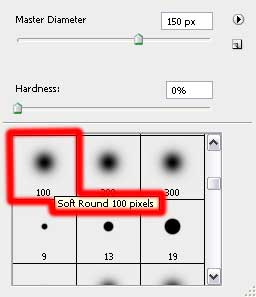
Next create a new layer (Create new layer) and choose the Brush Tool (B) out of the set Floral. The brush’s color is white and its layer should be placed on the layers’ panel lower than the girl’s layer.

Make a mouse click on the last layer on Add a Mask option that may be found on the lowest part of the layers’ panel. Select the Brush Tool (B) of black color and Opacity of 10% to clean out easily and attentively the brushes’ ornament.

Create a new layer again and select this time the brushes out of this set: BRUSHES_01_02. Select also the white color for the brushes and situate this layer on the layers’ panel also lower than the girl’s layer.
Select the next indicated parameters for the brush’s layer: Blending mode-Soft Light
Create one more new layer (Create new layer) where we’ll use the brush out of the earlier mentioned set: (BRUSHES_01_02) But this time we must select this color for the brush #747474. This layer should be positioned the same way the previous are.
The layer’s parameters: Blending mode-Vivid Light
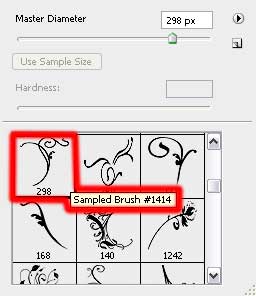
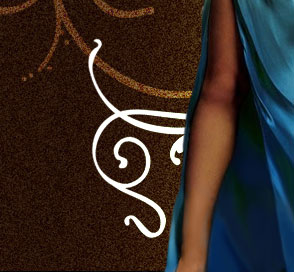
Now it’s time to create one more new layer for using on it the sampled Brushes – curls of white color. The new layer should be placed the same way with the rest of the layers – lower than the girl’s layer (on the layers’ panel).

Make a mouse click on the same layer on Add a Mask option that may be found as you already know on the lowest part of the layers’ panel. Choose quickly the Brush Tool (B) of black color and Opacity of 10% to clean out smoothly the brushes’ ornaments.
Create another new layer (Create new layer) for applying on it the Brushes – curls of white color, placing the new layer lower than the girl’s layer on the layers’ panel.

The layer’s parameters: Blending mode-Soft Light
On the next new layer we’ll apply the brushes out of the same set used earlier. Their color is white too. The new layer should be positioned the same way as the previous layers were placed out.
The layer’s parameters: Fill 30%
On the next stage we have to draw a kind of light around the girl. Create a new layer for this operation and apply on it the Brush Tool (B) of white color and Opacity of 10%. It’s necessary to situate this layer on the layers’ panel lower than the girl’s layer too.
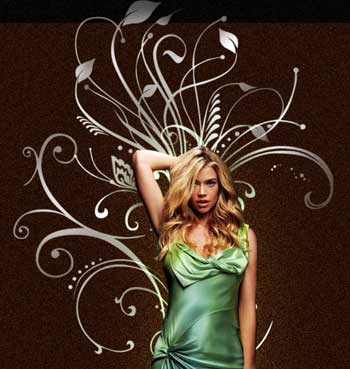
Next create another new layer (Create new layer) and use again the Brushes – curls.
the color of the brush is #6F3C27
the color of the brush is #97BD58
color of the brush is #0A224A
Select these parameters from below for the last made layer: Blending mode-Hue
Create once again a new layer (Create new layer) where we have to use the Brush Tool (B) and Opacity of 10% with the colors used before for the previous brushes to give more volume to the luminescence around the girl.

The layer’s parameters: Fill 50%
Blending mode-Hard Light
On the next new layer we’ll select again the brushes out of the set BRUSHES_01_02
the brush’s color: #F6B36F
the brush’s color: #781A01
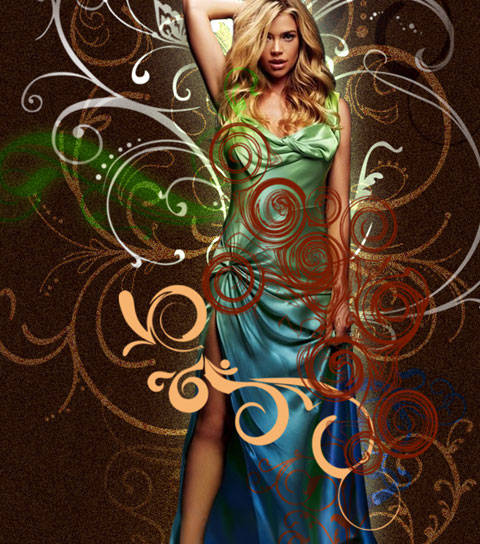
The layer’s parameters: Blending mode-Soft Light
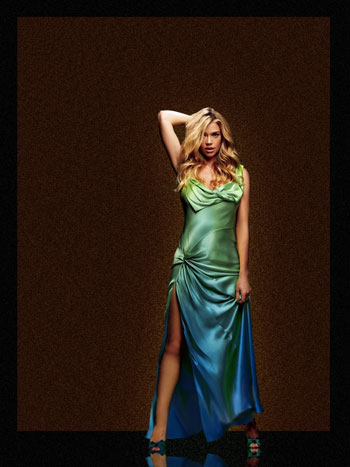
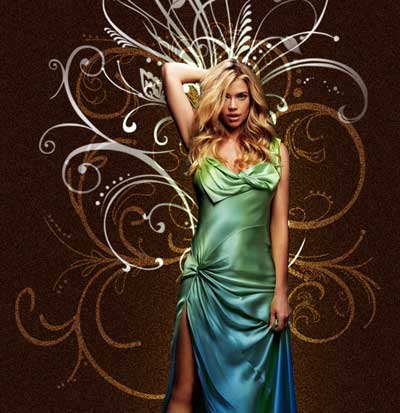
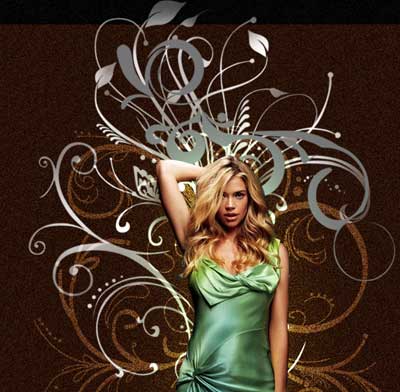
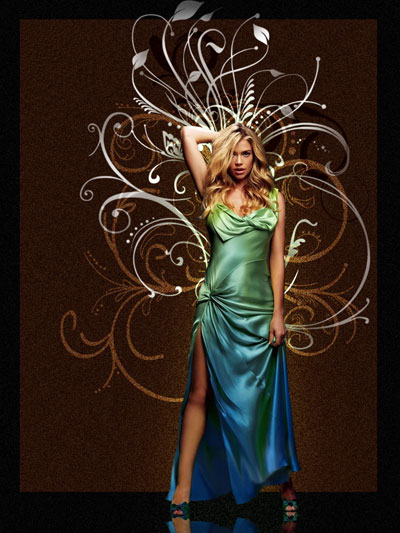
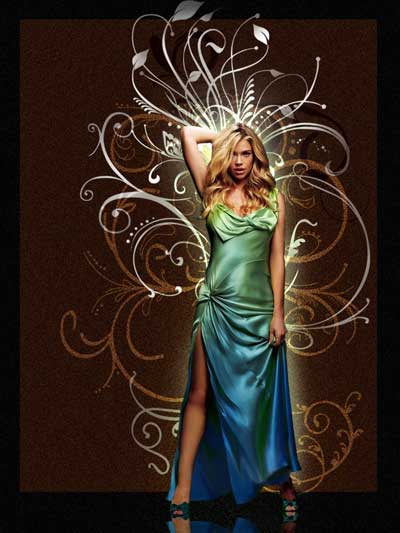
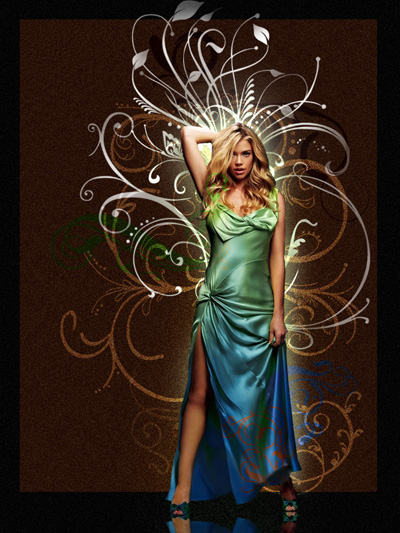
Finished!
In this tutorial we will teach how to create fruits wallpaper.

Create a new file (File>New) with 1280×1024 px and 300 dpi. After that we have to select the Rectangle Tool (U) and use it for stretching out the color on the whole page.
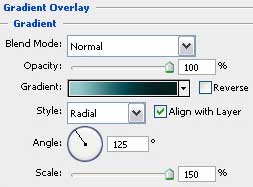
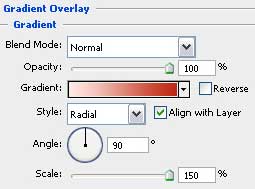
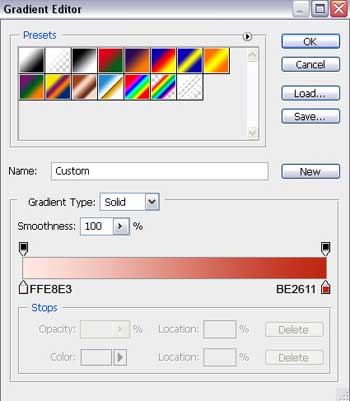
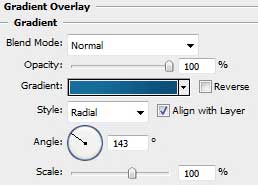
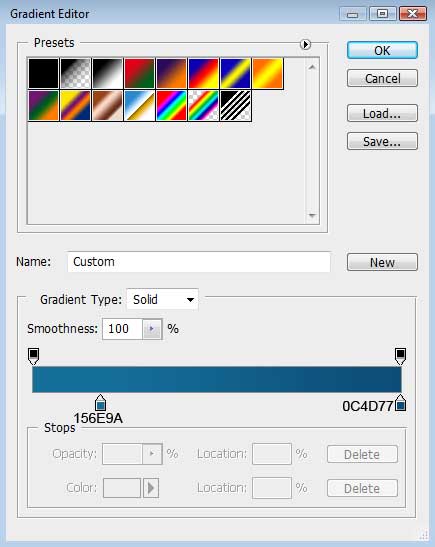
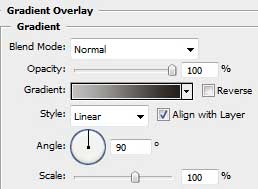
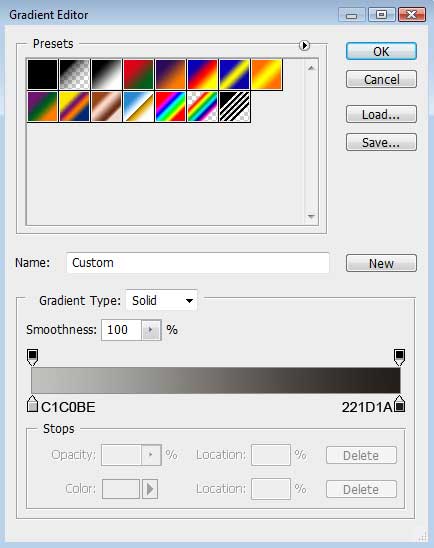
Select now the Blending Options>Gradient Overlay
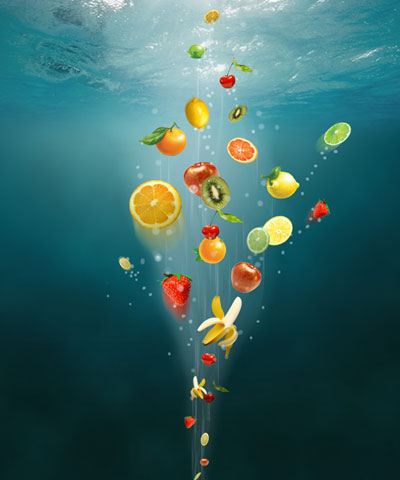
This is the picture we should get. It should represent scenery under the water.

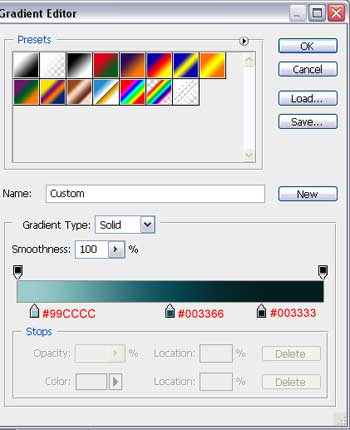
Create a new layer and paint it out with the Paint Bucket Tool (G) with the color’s code shown here: #003366

Select on the layer the next options: Filter>Render>Clouds.

Set the parameters for the layers’ palette the way it is indicated next small table:
It’s what we’ve got:

Next we have to choose on the lowest layers’ palette the mask’s option:
 Choose the mask itself:

And next apply the Gradient Tool (G) to draw the gradient on the layer. The top part of the layer became transparent as you may see on the picture below:

Next step includes finding in Internet an underwater scenery, as next picture shows it:
Using the Eraser Tool (E), we may cut out all the unnecessary elements, except the water’s surface.
Move this picture on our picture and place it on the top part of the original one.
Select after that the Brush Tool (B) with the color #669999 and the Opacity of 10%. The brush’s adjustments should be those indicated below:
Try to represent next a kind of hazy mist:
Create a new layer and apply on it the Pencil Tool (B) for drawing several lines, resembling the whirlwind. The color is still the same.
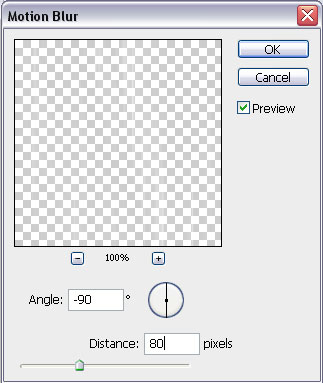
 Enter the next options, Filter>Blur>Motion blur… and set them as the table indicates it:
We should get such a waterspout.
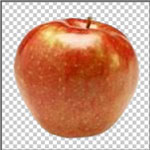
Find in Internet several pictures containing the fruits. If the background happens to be white one, then we’ll need the Magic Wand Tool (W) for cutting it out. If the background is colored one, then we’ll need the Eraser Tool (E).

After cutting out the fruits from their background, we have to insert the fruits on out picture and place them in an arbitrary way.
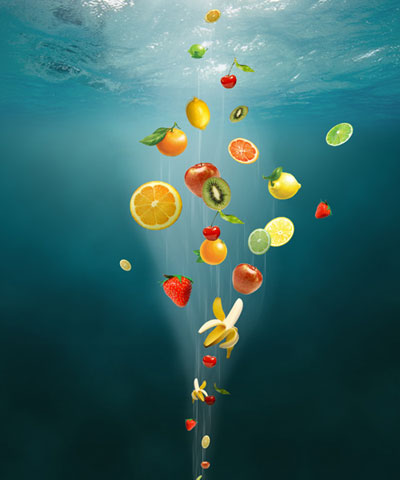
Make several copies of some fruits and apply the next shown options on the copied layer: Filter>Blur>Motion blur. The blurring directions should be set according to the fruit’s placement.
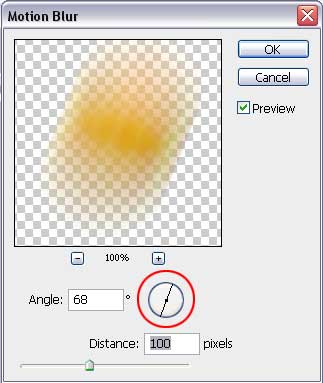
The top part of the blurred copy should be erased with the Eraser Tool (E) for showing the object’s motion.
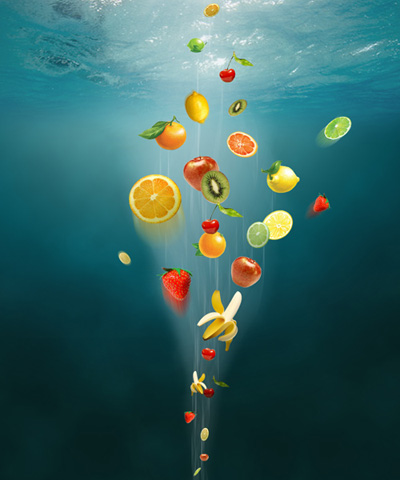
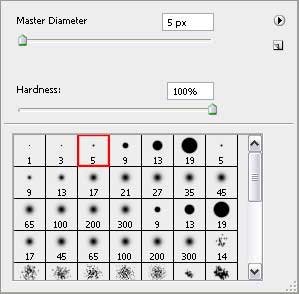
Create one more layer now and select the Brush Tool (B) with the color #669999 and then try to draw the air bubbles on our picture, changing if necessary the Master Diameter.
 It’s what we should get:
Add the FRESH inscription on the upper part of the picture, but be attentive with the text’s demands. Use only those indicated in the next table:

Apply the next shown parameters for the layers’ palette.
The picture is finished!

This tutorial shows a quick and easy way to make abstract backgrounds in Photoshop.
Start working by creating a new file (File>New) with 1024×768 px and 72 dpi.
Choose for the layer the Paint Bucket Tool (G) to paint it in the next shown color: #023D65

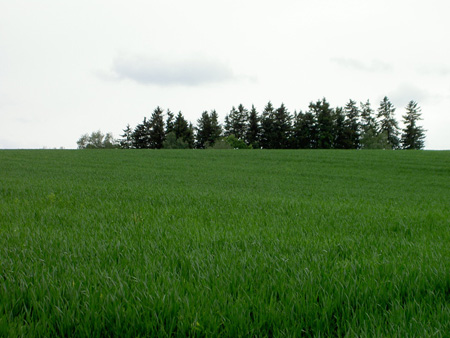
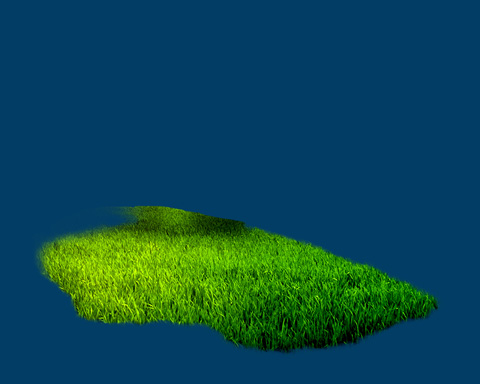
Find in Internet a picture, representing the grass:
Cut out a fragment of the shown grass, as it is presented below and insert the fragment on our picture:

Set the next parameters for the layer by making a mouse click on the layer on the layers’ panel:
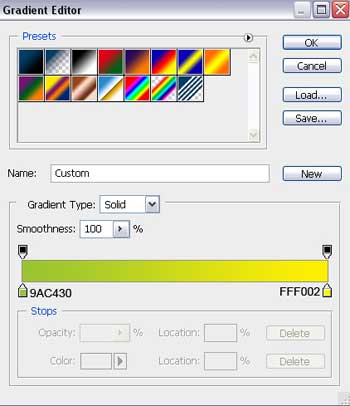
Blending Options>Gradient Overlay
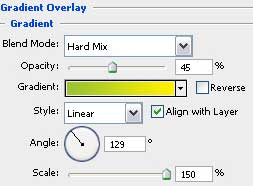
Gradient’s parameters:
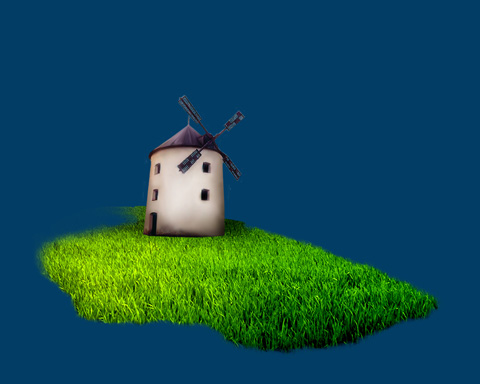
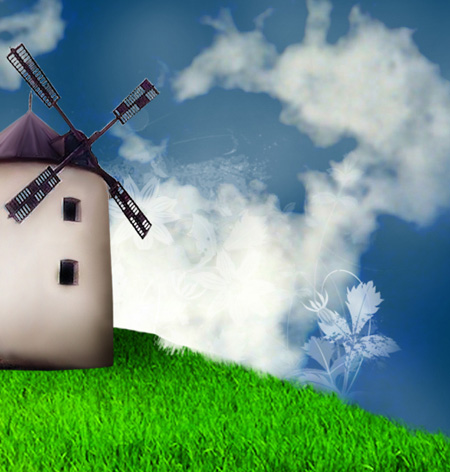
Find in Internet a picture representing this time a mill:
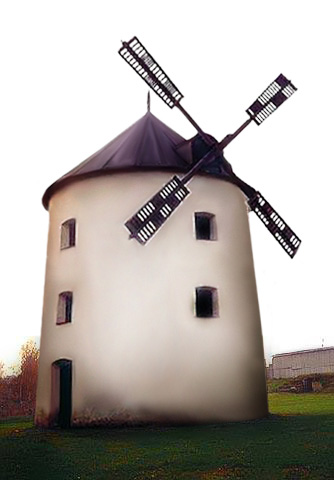
Cut out the element and introduce it in our picture:
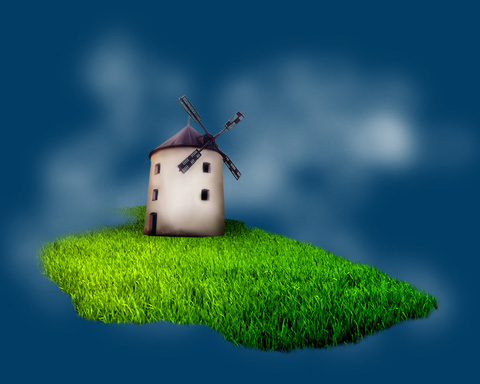
Create a new layer and select for it the Brush Tool (B) with blurred edges, white color and Opacity of 10%. This layer must be placed lower than the layers containing the grass and the mill (on the layers’ panel):
Find next in Internet a picture showing the sky:

Cut out the unnecessary part of the sky and insert on the picture only that fragment we need, placing this layer also lower than the layers containing the grass and the mill (on the layers’ panel).
Apply for this layer the next demonstrated parameters: Blending mode-Pin Light
Download out of Internet a set of ready to use brushes for Adobe Photoshop, named Flowery by ca_pris. Next step includes creating a new layer (Create new layer) and applying the brush from the mentioned above set. This layer should be placed also lower than the layer containing the grass and the mill (on the layers’ panel). The brush’s color this time is white.
Make a copy of the last made layer and place the copy above the recently made one:
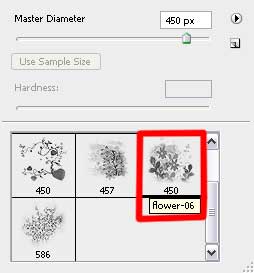
Create a new layer and apply one of the brushes from the set Flowery by ca_pris. Place this layer lower than the layer containing the mill (on the layers’ panel).The brush’s color is white.
Now we have to download out of Internet again another set of brushes for Adobe Photoshop: Floral.
Next step we should apply the set’s brush and place this layer above the layer with the grass (on the layers’ panel). The brush’s color is white again.

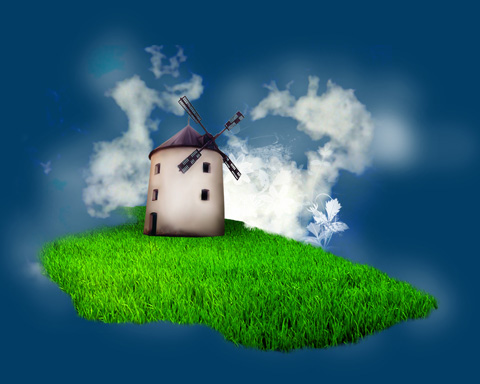
Find in Internet a picture representing the trees:
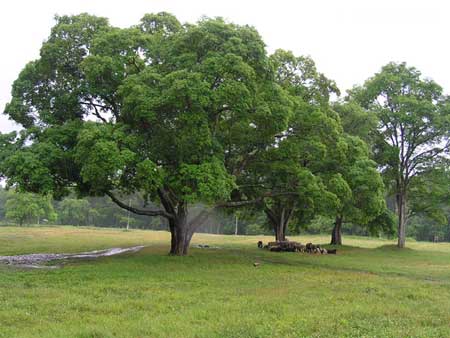
Cut out the trees and insert them on the basic picture, placing the trees’ layer lower than the layer having the mill on it. Press CTRL+U

Create a new layer and use on it the Floral set’s brush. The brush’s color is white and the layer in case must be placed above the trees’ layer, but lower than the layer containing the mill (on the layers’ panel).

Next we’ll use the Custom Shape Tool (U) for representing a small star, colored with #FFE725

Make four copies of the last made layer and select the Free Transform option to make the copies smaller and to turn them over the same way shown below:

Using the Rounded Rectangle Tool (U), (radius 10), it’s possible to represent a cross. For the beginning we’ll try to represent the first element and then the other one by pressing the SHIFT button. The color should be #99CC01

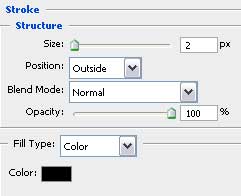
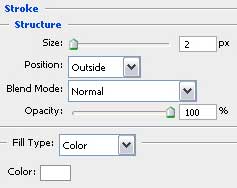
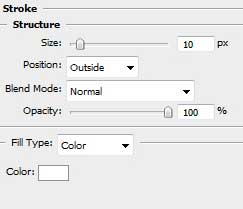
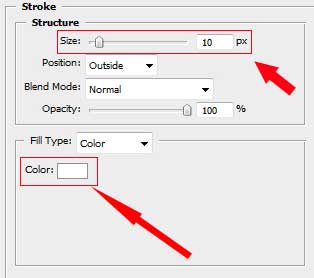
The layer’s parameters: Blending Options>Stroke

Make two copies of the last made layer and select Free Transform option to change the copies’ sizes if necessary and to place them the way shown next picture:

Using the Custom Shape Tool (U), it’s possible to represent a flower of white color.
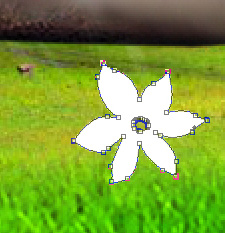
Apply the next demonstrated parameters: Blending Options>Stroke

Make the necessary number of copies of the last made layer and select again the Free Transform option to change the copies’ sizes and to place them the way demonstrated below:

Find in Internet this time a picture representing an air balloon:
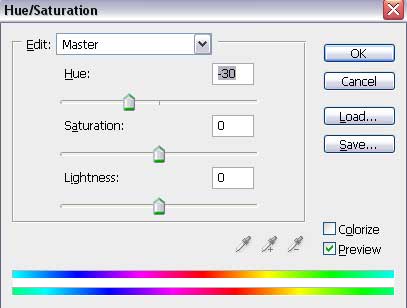
Cut out the balloon and insert it on our picture, pressing Ctrl+U buttons and changing its color:

Make a copy of the balloon layer and choose again the Free Transform selection to enlarge the copy. Press CTRL+U combination of buttons and change the copy’s color. We have to place the copy as it is shown next picture:
The picture is finished
Final Image Preview
Create a new file (File>New) with 1280×1024 px and 300 dpi. After that we have to select the Rectangle Tool (U) and use it for stretching out the color on the whole page.
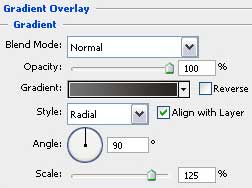
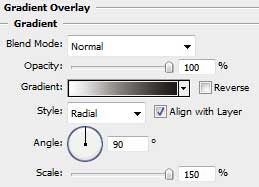
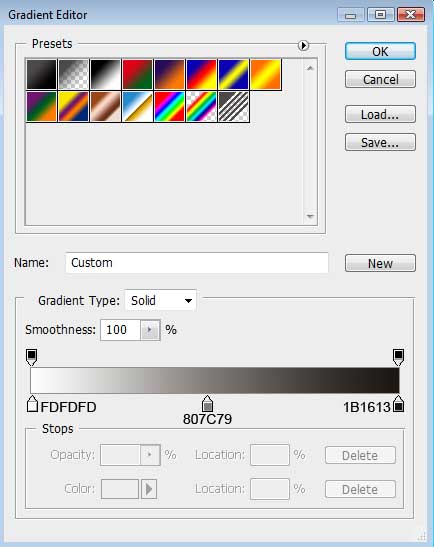
Select now the Blending Options>Gradient Overlay
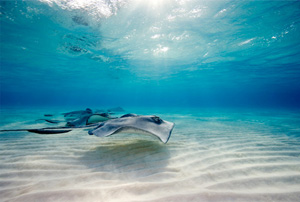
This is the picture we should get. It should represent scenery under the water.
Create a new layer and paint it out with the Paint Bucket Tool (G) with the color’s code shown here: #003366
Select on the layer the next options: Filter>Render>Clouds.
Set the parameters for the layers’ palette the way it is indicated next small table:
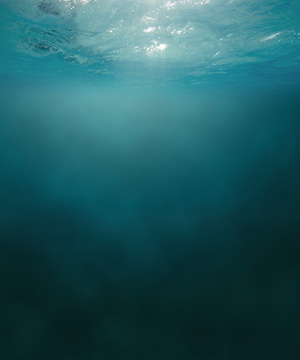
It’s what we’ve got:
Next we have to choose on the lowest layers’ palette the mask’s option:
Choose the mask itself:And next apply the Gradient Tool (G) to draw the gradient on the layer. The top part of the layer became transparent as you may see on the picture below:
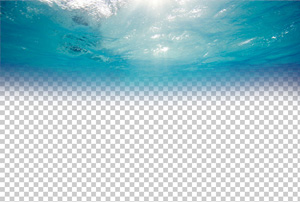
Next step includes finding in Internet an underwater scenery, as next picture shows it:
Using the Eraser Tool (E), we may cut out all the unnecessary elements, except the water’s surface.
Move this picture on our picture and place it on the top part of the original one.
Select after that the Brush Tool (B) with the color #669999 and the Opacity of 10%. The brush’s adjustments should be those indicated below:
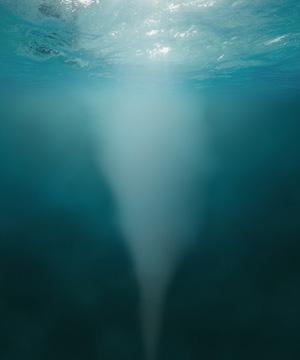
Try to represent next a kind of hazy mist:
Create a new layer and apply on it the Pencil Tool (B) for drawing several lines, resembling the whirlwind. The color is still the same.
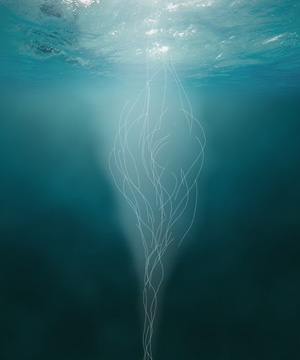
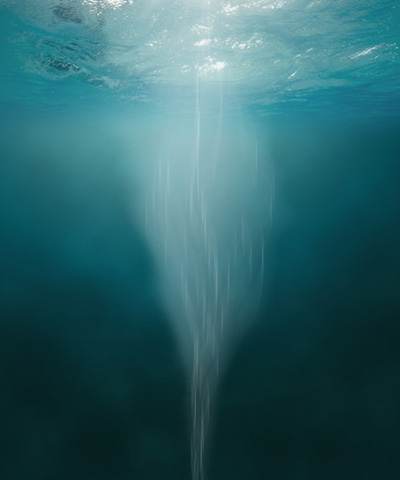
Enter the next options, Filter>Blur>Motion blur… and set them as the table indicates it:We should get such a waterspout.
Find in Internet several pictures containing the fruits. If the background happens to be white one, then we’ll need the Magic Wand Tool (W) for cutting it out. If the background is colored one, then we’ll need the Eraser Tool (E).
After cutting out the fruits from their background, we have to insert the fruits on out picture and place them in an arbitrary way.
Make several copies of some fruits and apply the next shown options on the copied layer: Filter>Blur>Motion blur. The blurring directions should be set according to the fruit’s placement.
The top part of the blurred copy should be erased with the Eraser Tool (E) for showing the object’s motion.
Create one more layer now and select the Brush Tool (B) with the color #669999 and then try to draw the air bubbles on our picture, changing if necessary the Master Diameter.
It’s what we should get:Add the FRESH inscription on the upper part of the picture, but be attentive with the text’s demands. Use only those indicated in the next table:
Apply the next shown parameters for the layers’ palette.
The picture is finished!
This tutorial shows a quick and easy way to make abstract backgrounds in Photoshop.
Start working by creating a new file (File>New) with 1024×768 px and 72 dpi.
Choose for the layer the Paint Bucket Tool (G) to paint it in the next shown color: #023D65
Find in Internet a picture, representing the grass:
Cut out a fragment of the shown grass, as it is presented below and insert the fragment on our picture:
Set the next parameters for the layer by making a mouse click on the layer on the layers’ panel:
Blending Options>Gradient Overlay
Gradient’s parameters:
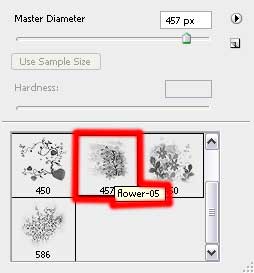
Find in Internet a picture representing this time a mill:
Cut out the element and introduce it in our picture:
Create a new layer and select for it the Brush Tool (B) with blurred edges, white color and Opacity of 10%. This layer must be placed lower than the layers containing the grass and the mill (on the layers’ panel):
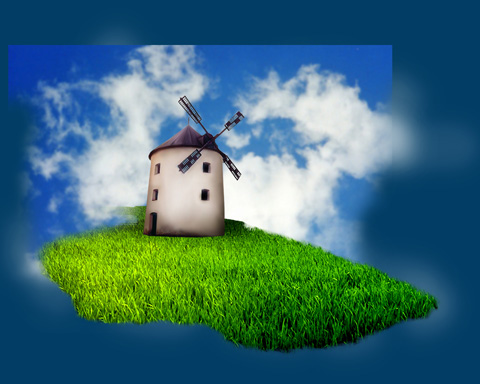
Find next in Internet a picture showing the sky:
Cut out the unnecessary part of the sky and insert on the picture only that fragment we need, placing this layer also lower than the layers containing the grass and the mill (on the layers’ panel).
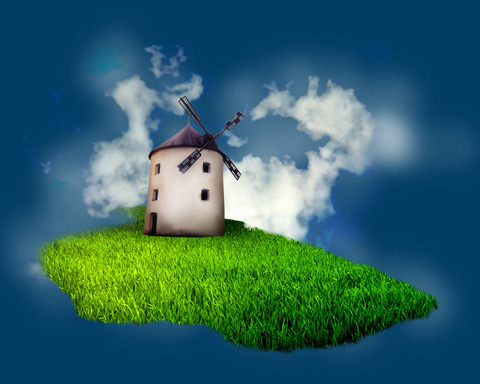
Apply for this layer the next demonstrated parameters: Blending mode-Pin Light
Download out of Internet a set of ready to use brushes for Adobe Photoshop, named Flowery by ca_pris. Next step includes creating a new layer (Create new layer) and applying the brush from the mentioned above set. This layer should be placed also lower than the layer containing the grass and the mill (on the layers’ panel). The brush’s color this time is white.
Make a copy of the last made layer and place the copy above the recently made one:
Create a new layer and apply one of the brushes from the set Flowery by ca_pris. Place this layer lower than the layer containing the mill (on the layers’ panel).The brush’s color is white.
Now we have to download out of Internet again another set of brushes for Adobe Photoshop: Floral.
Next step we should apply the set’s brush and place this layer above the layer with the grass (on the layers’ panel). The brush’s color is white again.
Find in Internet a picture representing the trees:
Cut out the trees and insert them on the basic picture, placing the trees’ layer lower than the layer having the mill on it. Press CTRL+U
Create a new layer and use on it the Floral set’s brush. The brush’s color is white and the layer in case must be placed above the trees’ layer, but lower than the layer containing the mill (on the layers’ panel).
Next we’ll use the Custom Shape Tool (U) for representing a small star, colored with #FFE725
Make four copies of the last made layer and select the Free Transform option to make the copies smaller and to turn them over the same way shown below:
Using the Rounded Rectangle Tool (U), (radius 10), it’s possible to represent a cross. For the beginning we’ll try to represent the first element and then the other one by pressing the SHIFT button. The color should be #99CC01
The layer’s parameters: Blending Options>Stroke
Make two copies of the last made layer and select Free Transform option to change the copies’ sizes if necessary and to place them the way shown next picture:
Using the Custom Shape Tool (U), it’s possible to represent a flower of white color.
Apply the next demonstrated parameters: Blending Options>Stroke
Make the necessary number of copies of the last made layer and select again the Free Transform option to change the copies’ sizes and to place them the way demonstrated below:
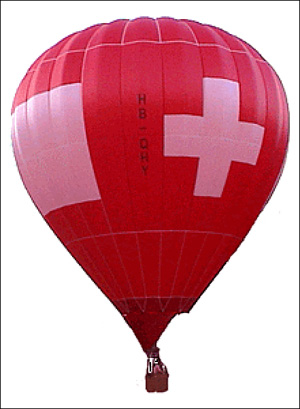
Find in Internet this time a picture representing an air balloon:
Cut out the balloon and insert it on our picture, pressing Ctrl+U buttons and changing its color:
Make a copy of the balloon layer and choose again the Free Transform selection to enlarge the copy. Press CTRL+U combination of buttons and change the copy’s color. We have to place the copy as it is shown next picture:
The picture is finished
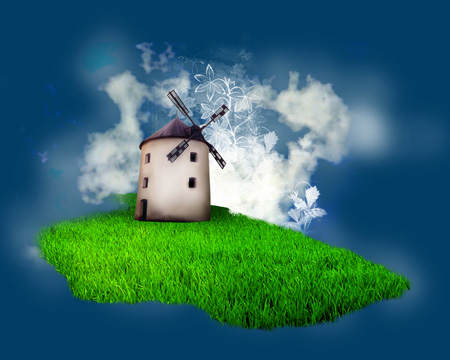
Learn in this tutorial how to create a vector Valentine’s heart with additional effects and textures.
Final Image Preview

Begin by representing a new file (File>New) that must have 1024×768 px and 72 dpi. Use next the Rectangle Tool (U) to draw the background of our picture we want to get finally.

Select the next demonstrated parameters by making a mouse click on the layer we work with on the layers’ panel. Fill 0%
Blending Options>Gradient Overlay
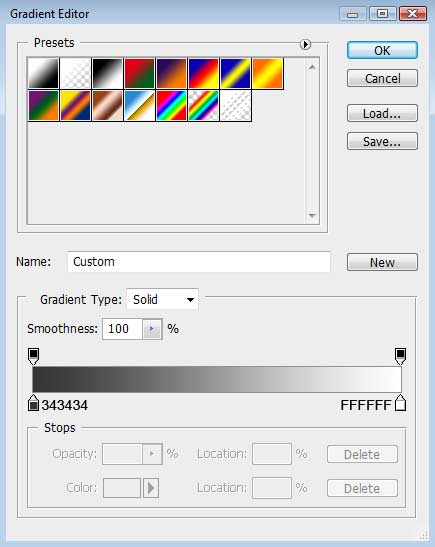
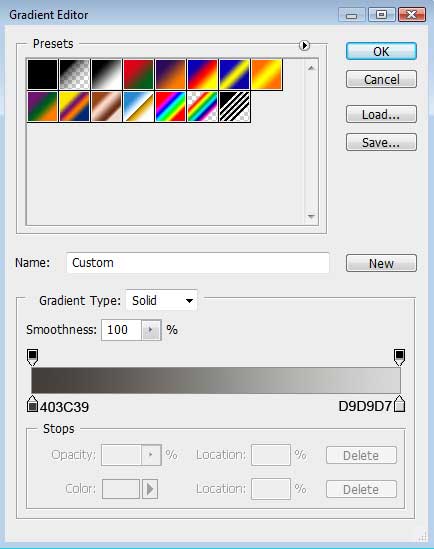
Gradient’s parameters:


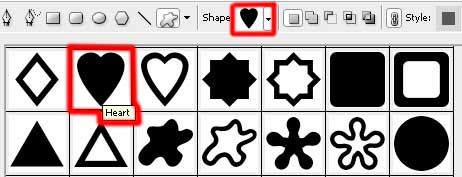
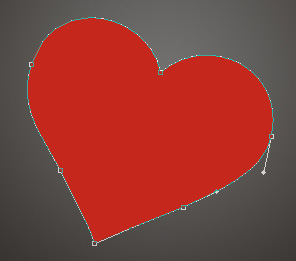
Applying the Custom Shape Tool (U), it’s possible to draw a heart that may be turned over the way shown below with the Free Transform selection. The heart’s color is #C5271C
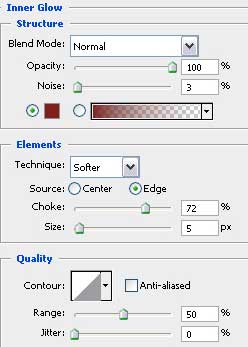
The layer’s parameters: Blending Options>Inner Glow

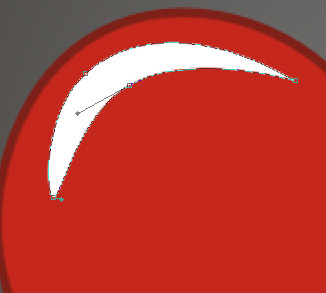
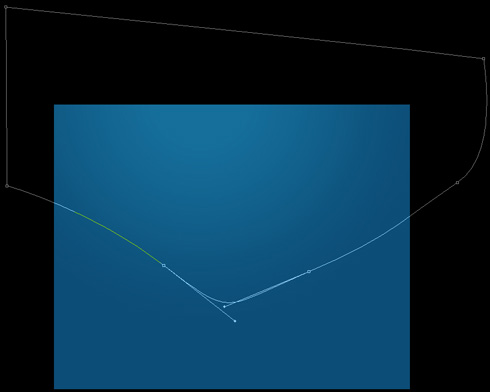
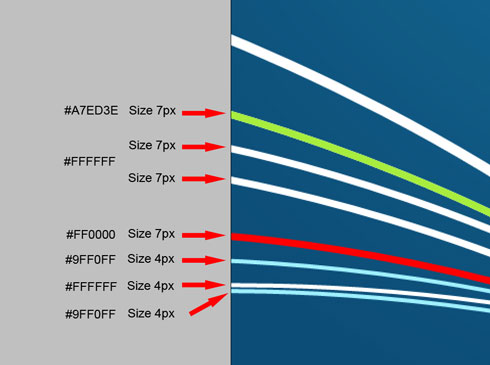
Now we should draw a highlight of white color, using the Pen Tool (P). The element’s shape may be corrected with Convert Point Tool.

Use the same tools for drawing one more highlight on the heart.
Each layer containing the highlights must have the same parameters, indicated next: Fill 40%

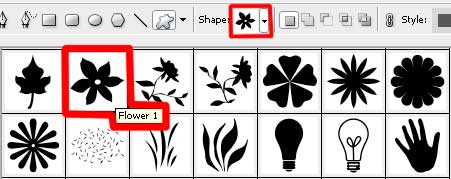
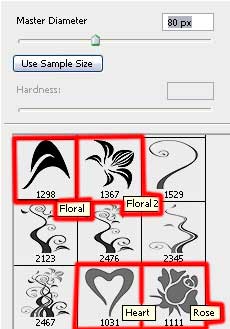
Download from Internet sets of ready to use brushes for Adobe Photoshop, named: BloodPack1__invaynestock, Vector_Brushes, Floral.
Create a new layer and use the Brush Tool (B) out of the set BloodPack1__invaynestock. The color that the brush has is #A9A8A7. Place the brush’s layer under the heart’s layer on the layers’ panel.

Create one more new layer (Create new layer) and use on it the above mentioned brush. Select after that the Free Transform option to turn over the elements, placing them the way shown next picture. The brush’s color is #DEDDDD. This layer should be situated also under the heart’s layer on the layers’ panel,

Select the same parameters from below for both layers containing the brushes. Fill 40%

Take the Pen Tool (P) of white color to draw a wing which shape also may be corrected with the Convert Point Tool. The wing’s layer should be situated under the heart’s layer too.


Make a copy of the layer containing the white wing and choose Free Transform selection to turn around the copy for placing it the same way illustrated below. The new wing’s layer is placed under the heart’s layer on the layers’ panel.

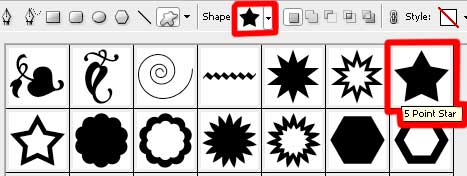
Choose one more time the Custom Shape Tool (U) to draw a small star.

The layer’s parameters: Blending Options>Inner Glow

Blending Options>Gradient Overlay
Gradient’s parameters:
Blending Options>Stroke
 Make two copies of the layer containing the star and select again the Free Transform option to make the necessary changes on the copies’ sizes, placing them as below:
Create a new layer again (Create new layer), using this time on it the brushes out of the set Vector_Brushes. The brushes’ color is #393532. Turn around the brushes the way shown below and place the new layer under the heart’s layer on the layers’ panel.

Combine in a group all the layers containing the brushes Vector_Brushes (press Ctrl button to mark out the corresponding layers and hold on the left mouse’s button while moving the marked layers on Create a new group selection). Select the next parameters for the new group.
Blending mode-Hard Light

Create again a new layer (Create new layer) and use on it the mentioned above brushes. The color of the Floral brushes is #878684. Rose brushes have the color #605C5B

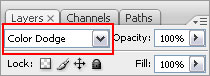
Combine in a group all the layers of the recently applied brushes (hold on Ctrl button for marking out the necessary layers and then keep pressed the left mouse’s button while taking the marked layers on Create a new group option). Apply the next parameter for the last created group:
Blending mode-Color Dodge

On the next layer (Create new layer) we should select the Floral brushes. Their color is white and their location may be changed with the Free Transform selection.

On the next layer (Create new layer) we’ll select the Brush Tool (B) to draw several small circles of white color, having the color #EEB7B0

Create one more new layer and select the Brush Tool (B) out of the set entitled Vector_Brushes. The brushes’ color is white and their position may be changed again with Free Transform option.

Representing the picture came to end!
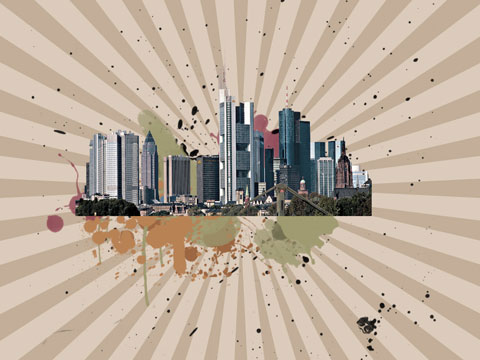
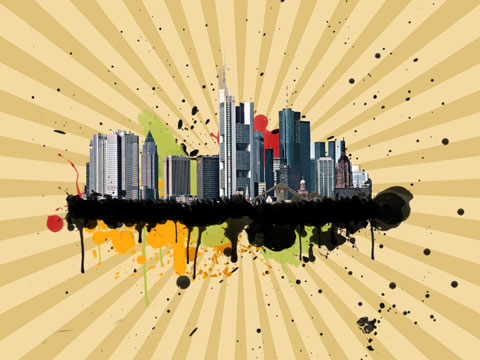
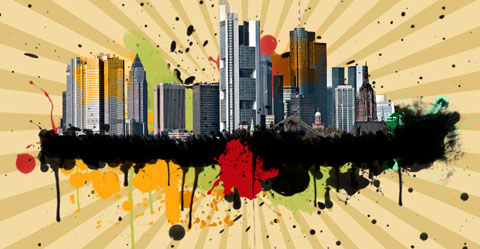
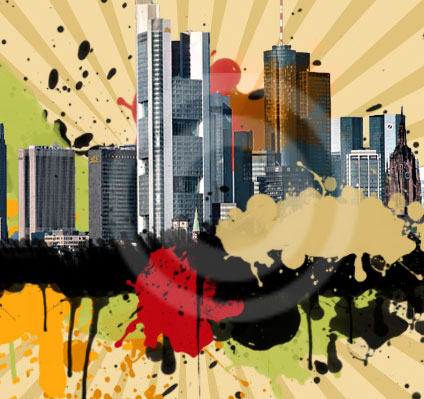
In this tutorial I will be teaching you how to add a grunge scene style to your photos.
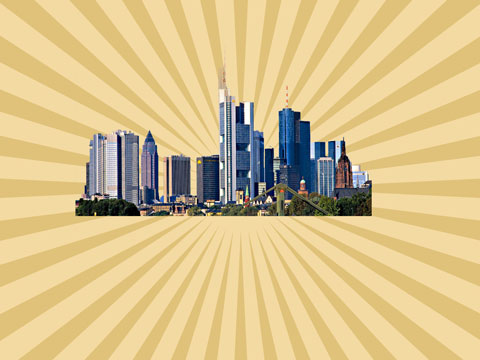
Create a new file (File>New) with 1024×768 px and 100 dpi. Select on this layer the Paint Bucket Tool (G) to give it the color #F3DAA2

Choose next the Custom Shape Tool (U) to represent the next layer belonging to the background of the picture we’ll get on the final stage. The color is #E0C27A

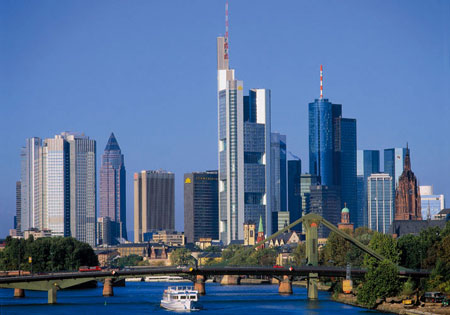
Find in Internet a photo of a megapolis. Cut out the unnecessary elements of it and insert the main element in the middle of the picture.
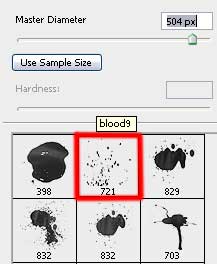
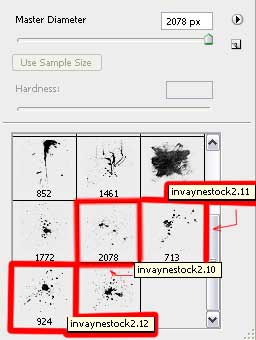
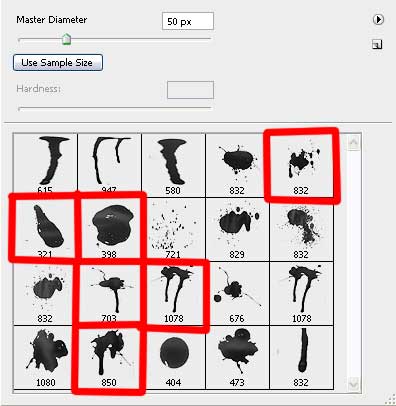
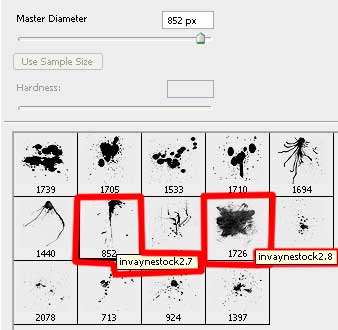
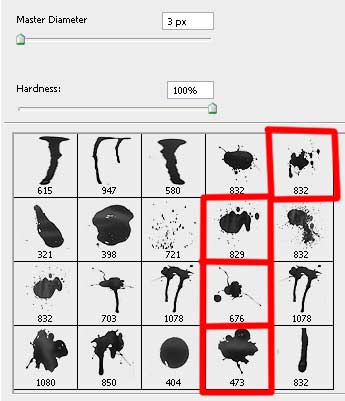
Download out of Internet a set of ready to apply brushes for Adobe Photoshop: BloodPack1__invaynestock, bloodbrushes2_invaynestock, Bush Pack v1
Create a new layer after that and select the Brush Tool (B) out of the set BloodPack1__invaynestock. The selected brushes’ color should be #C42622. Place the layer containing the brushes lower than the layer with the photo of the megapolis (on the layers’ panel).


On the next layer we’ll apply the next set of brushes bloodbrushes2_invaynestock, having the white color. This layer will be placed lower than the layer containing the picture of the city (on the layers’ panel).

Create a new layer again and select the next brushes out of the set BloodPack1__invaynestock. Place this layer lower than the layer containing the photo of the city (on the layers’ panel).
the color #DD8301
the color #BCC450

Use the next set of brushes named bloodbrushes2_invaynestock, having the color #FFA80E. The layer will be situated in the layers’ panel also lower than the layer containing the picture of the city.

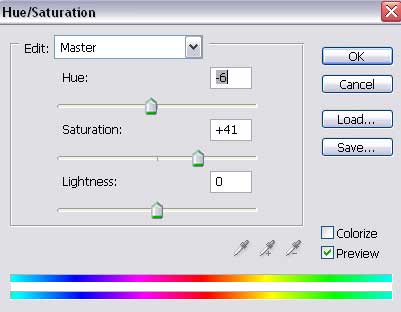
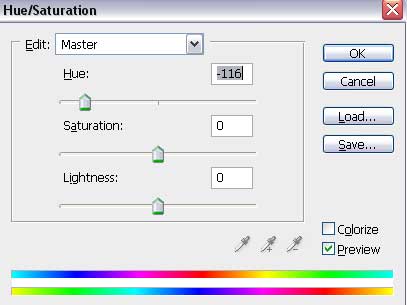
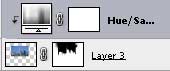
Make a mouse click on the lowest part of the layers’ panel on the next selection Create new fill or adjustment layer>Hue/Saturation. Place this layer above the layer containing the megapolis (on the layers’ panel).
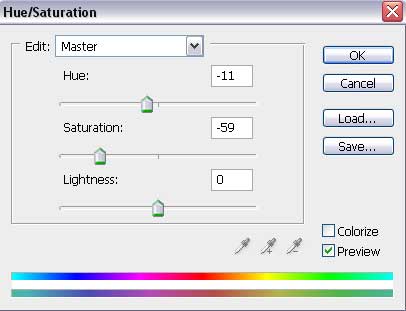
Press Alt button and make a mouse click between the layers of the effect Hue/Saturation and the megapolis’s layer for the effect to be applied in the limits of the megapolis.

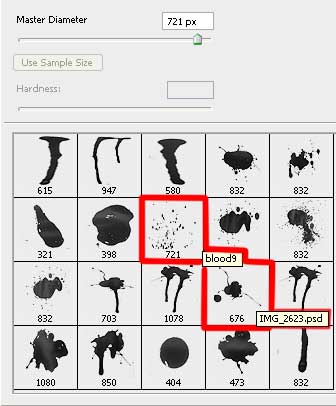
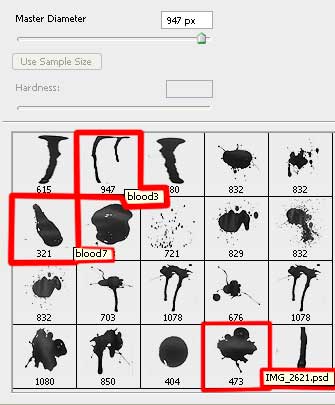
Create a new layer and apply the brushes out of the set BloodPack1__invaynestock. The color of the selected brushes is black. We’ll apply mainly the brush, named blood 7 earlier used.

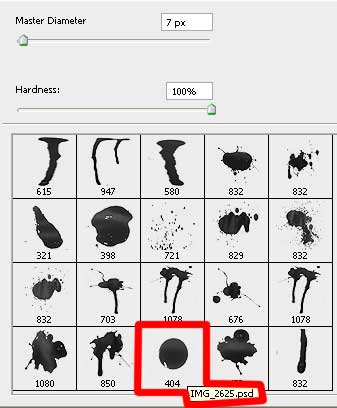
Create a new layer and select the brush out of the set BloodPack1__invaynestock. The brush’s color is black.
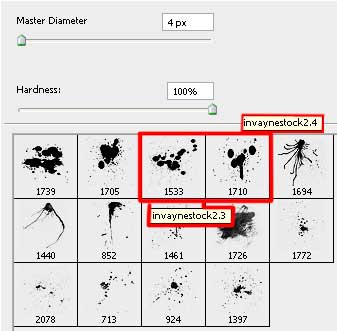
Next we’ll select again the brushes out of the set BloodPack1__invaynestock, bloodbrushes2_invaynestock. The brushes should be used on a new layer, but the set’s brushes, named bloodbrushes2_invaynestock should be used on a different layer.
the brush’s layer #BA0710
the brushes’ layer : invaynestock 2.2 - #005826, invaynestock 2.8 - #FDAF25, #EDAA60 the brushes used on a different layer.

The brushes’ layer of the set bloodbrushes2_invaynestock needs the next parameters: Blending mode-Color
On the next layer we’ll select the brushes out of the set bloodbrushes2_invaynestock. The brushes’ color is black.
Apply again the brushes out of the set BloodPack1__invaynestock. The brushes’ color is #D2B66F.

On the next three layers (for each of it press Create a new layer option) apply the next brushes out of the set Bush Pack v1. On two layers we need to apply the next demonstrated brush in the table:
the brush’s color is white: Fill 20% on the first layer
Fill 50% on the second layer

On the third layer we’ll apply the rest of the brushes, belonging to the set named Bush Pack v1. The brushes’ color is black.

Create a new file (File>New), having 4×4 px and 72 dpi and apply the Pencil Tool (B) of 1 px to represent the necessary texture. The color in this case is #C5A960
Edit>Define Pattern
Next create another new layer (Create new layer) and select for it the next option Edit>Fill for the earlier made texture to be applied.

Apply the next parameters for the layer: Blending mode-Darken
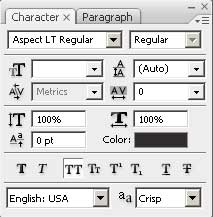
On the last stage we have to write the text, keeping the demands from the table below (color #312C2C):
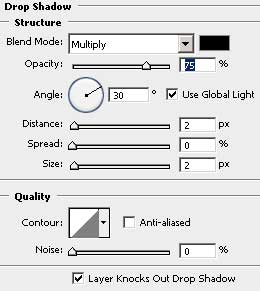
Blending Options>Drop Shadow

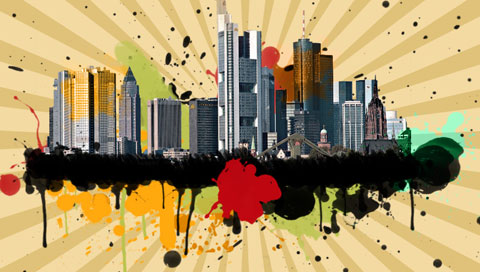
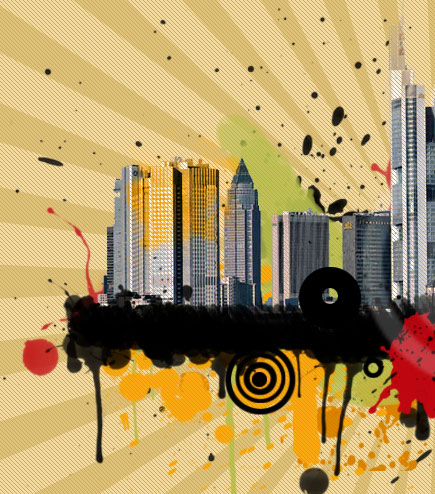
The picture is finished!

In this tutorial we will learn how to create a cool music design. We will use vector shapes and layer styles use vector shapes and layer styles.
Create a new file (File>New), having 1280×1024 px and 72 dpi.
Applying the Rectangle Tool (U), try to make the background of the picture to be.

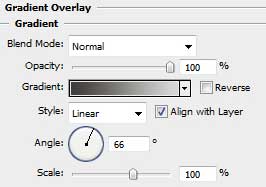
Set the next demonstrated parameters by making a mouse click on the layer we work with on the layers’ palette. Blending Options>Gradient Overlay
Gradient’s parameters:

Let’s represent a ribbon. In this case we need to select the Pen Tool (P) and the Convert Point Tool for making the appropriate corrections on the element’s shape.
The layer’s parameters: Blending Options>Stroke

Next we shall make eight copies of the last made layer and select the Free Transform option to turn over the copies, changing also the parameter Blending Options>Stroke for the copies.

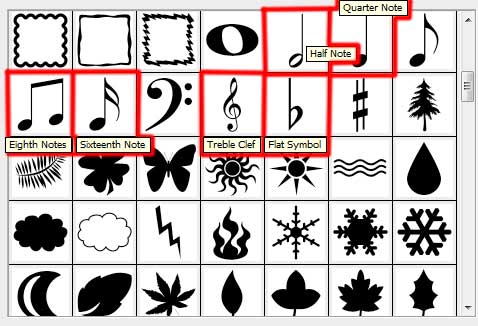
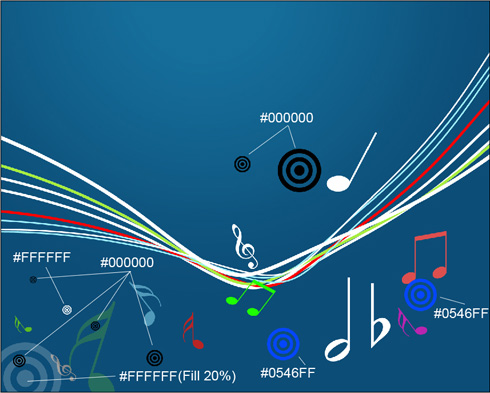
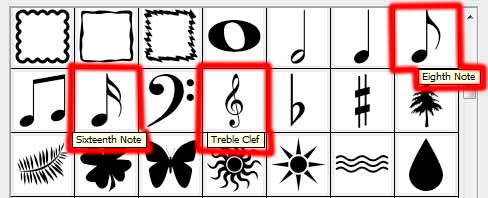
Using the Custom Shape Tool (U), let’s represent the musical symbols on the picture. Their sizes and inclining angle may be changed with Free Transform selection.
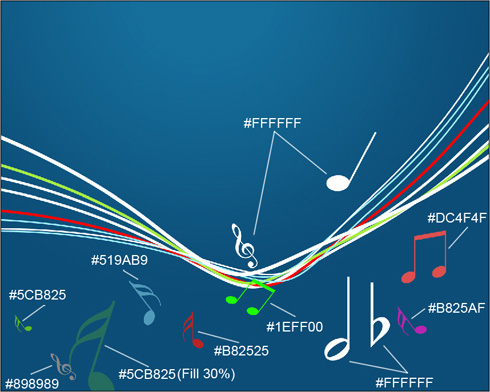
Select the same tool to insert several more circles.
Next we need to create the primary layer of the audio loud speaker, choosing for this operation the Ellipse Tool (U).

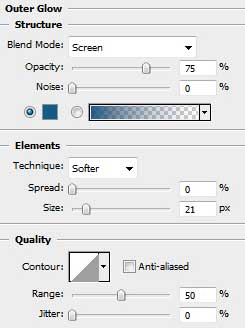
The layer’s parameters: Blending Options>Outer Glow
Blending Options>Gradient Overlay

Gradient’s parameters:

Applying the last used tool (Ellipse Tool (U)), it’s possible to represent the next layer belonging to the same loud speaker.

The layer’s parameters: Blending Options>Gradient Overlay
Gradient’s parameters:

Now it’s time for the next layer, made with the same tool.

The layer’s parameters: Fill 0%
Blending Options>Gradient Overlay
Gradient’s parameters:

Let’s represent the primary layer of the central part of the loud speaker. The instrument applied in this case is the Ellipse Tool (U) and the color #4D4948

Make a copy of the recently made layer and select again the Free Transform solution to make the copy smaller as it is shown below, changing its parameters with those indicated below. Blending Options>Gradient Overlay
Gradient’s parameters:

Next we must insert a kind of ornament on the loud speaker, the same way indicated below. In this case we’ll use the same tool.

The layer’s parameters: Fill 0%
Blending Options>Stroke
Gradient’s parameters:

Make four copies of the last made layer and try to increase uniformly each of the next copies. The Free Transform option is helpful when placing correctly the copies, using the same positions from below.

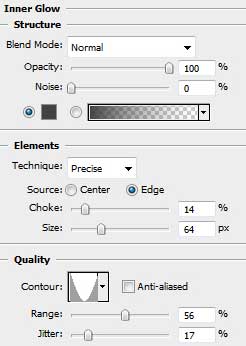
Let’s continue representing the loud speaker. The instrument that must be applied in this case is the Ellipse Tool (U). Firstly we need to represent the outside edges of the element and then press Alt button to move off the inside element’s parts. The color used in this case is white.

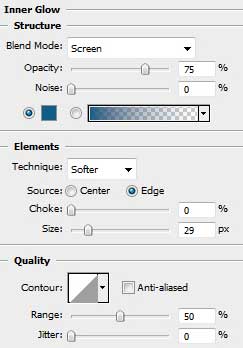
The layer’s parameters: Blending Options>Inner Glow

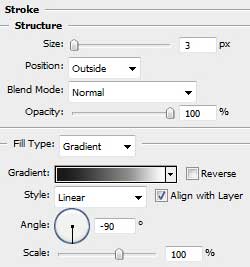
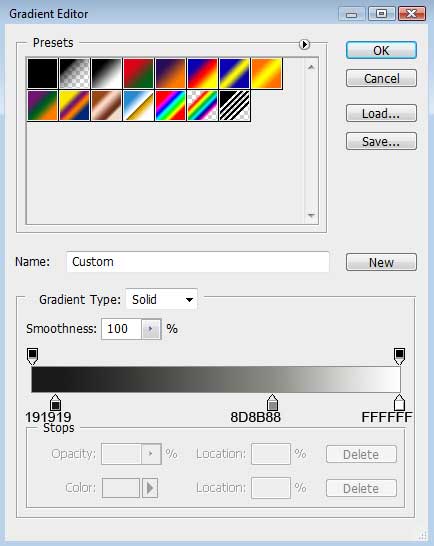
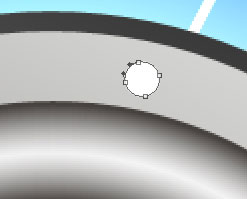
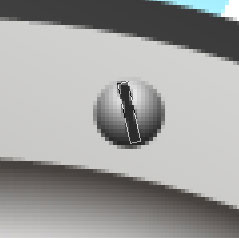
We need to represent next element containing the screw’s head on the lateral part of the loud speaker. The instrument applied in this case is the Ellipse Tool (U).
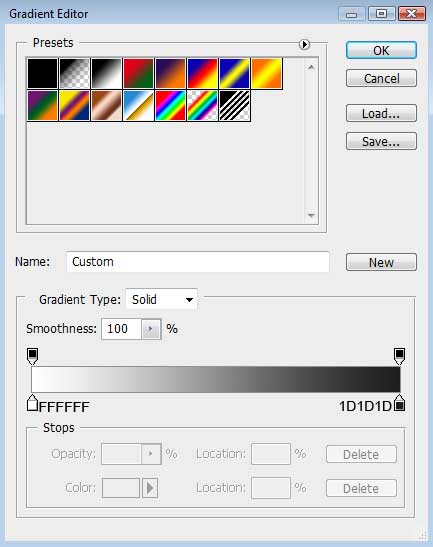
The layer’s parameters: Blending Options>Gradient Overlay
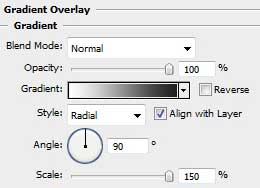
Gradient’s parameters:

Next we shall represent an opening on the top part of the screw, selecting for this operation the Rectangle Tool (U) and the color #2B2B2B
Make a copy of the layer containing the opening and select Free Transform option to turn over the copy the same way demonstrated next image.

Getting a better result is possible when combining together the layers composing the screw and those two openings (press Ctrl button to mark out the corresponding layers and hold on the left mouse’s button to move the marked layers on Create a new group solution). Make twenty – one copies of the represented group and select the Free Transform option to turn over the copies placing them as it is demonstrated below.

Next we need to represent the sound waves around the loud speaker. This time we need to choose the Ellipse Tool (U). The new waves’ layers should be situated lower than the previous speaker’s layers.

The layer’s parameters: Fill 0%
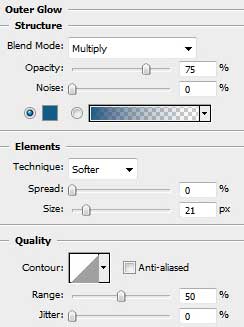
Blending Options>Outer Glow

Blending Options>Inner Glow

The next wave will be represented with the same tool.

The layer’s parameters: Fill 0%
Blending Options>Outer Glow
Blending Options>Inner Glow


Next stage we’ll represent the third sound’s wave, applying the method described above.

The layer’s parameters: Fill 0%
Blending Options>Outer Glow
Blending Options>Inner Glow


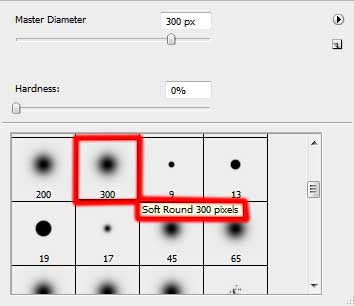
Create a new layer on which we’ll apply the Brush Tool (B) of black color (Opacity of 20%). Let’s represent a darkening with this tool. We need to position this layer lower than the loud speaker’s layers and the layers containing the sound waves (on the layers’ palette).

Create a new layer under the recently made one. Choosing the Paint Bucket Tool (G), it’s possible to add on it the white color.

Put together the layers containing the shadow’s layer and the white one. Press Ctrl button to accentuate the layers and press Ctrl +E. Set the next filter’s option for the combined layer: Filter>Pixilate>Color Halftone


Set the next parameters for the last made layer. Fill 70%
Blending Mode-Darken

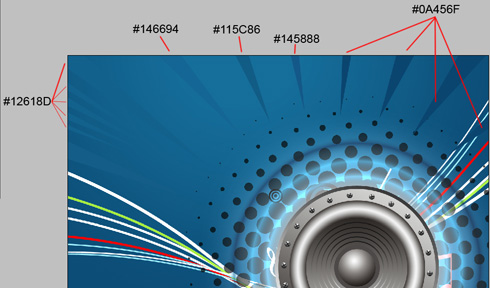
Next we need to insert several rays on the top part of the picture. The selected instrument for this operation is the Pen Tool (P). The ray’s color is #145D88

Applying the same tool, the Pen Tool (P), it’s possible to picture the rest of the rays we need to introduce on the picture.
On the last stage we’ll add several more musical symbols, choosing for the manipulation in case the Custom Shape Tool (U).

The final result!
Tidak ada komentar:
Posting Komentar